![]()
![]()
![]()
The live food required for nursing seabass from newly hatched larvae (after the yolk sac is absorbed) to 30 days old are Tetraselmis, rotifer, marine yeast, brine shrimp and Moina. The following are techniques of culture being used successfully at the Sg. Merbok hatchery.
The diatom, Tetraselmis chuii, as well as Chlorella and marine yeast, are basic food for rotifer culture. The culture techniques and nutrients required for mass production of the diatom are given in Tables 11, 12, 13. To prevent the diatom settling on the bottom of the culture tank, the culture media should be continuously stirred. To maintain the pH level of the culture medium within 7–8, an excess of CO2 should be provided.
Pure culture of Chlorella at density of 1 × 10⁷ cells/ml from 1-gall bottles are innoculated into a sufficiently aerated 1-t tank filled up to one third of its capacity with fresh water and with nutrients shown in Table 14. As the Chlorella cells increase in number, water is gradually added and appropriate amounts of fertilizers are applied. After 5 days a portion of the stock can be harvested. An equal volume of fresh seawater is added to the remaining stock and appropriate amounts of fertilizers are also supplied. A stock of Chlorella can last for a considerable period if there is good water management and contamination is minimized.
The rotifer, Brachionus plicatilis, feeds mainly on minute diatoms, yeast, bacteria, and protozoans. For mass production of the rotifer in hatcheries, Chlorella, Tetraselmis and marine yeast are used as a main source of food.
The following procedure is recommended:
Start with the culture of Chlorella, Tetraselmis and marine yeast until the density of the algae increases to 5 × 10⁶ cell/ml. On the 4th day innoculate a starter of rotifer, with a density of 10–20 pc/mg; the rotifer will increase its density to 70–100 pc/ml after the 10th day, and reach its peak on the 12th day. To maintain the culture of the rotifer at a considerable level, the Chlorella, Tetraselmis and marine yeast are added after the 11th day. Rotifer can be partially harvested after the 10th day. Harvesting is carried out by draining the culture through a nylon net (60 μ mesh size opening) leaving one third of the original volume to serve as a starter for the next batch.
The seed of marine yeast can be obtained locally from the drainage of the hatchery. The nutrients required for the marine yeast culture are given in Table 15. Within a few days, after adding the nutrients in strongly aerated seawater, the marine yeast should increase its density to 1 × 10⁶ cells/mg and be ready for use as food for the rotifer.
Brine shrimp, Artemia salina, is the best live food for seabass larvae aged 7–14 days. The amount of brine shrimp required is 5 nauplii/ml. For feeding the seabass larvae in a 0.2-t water tank, the amount of brine shrimp nauplii required can be calculated as follows:
| Feeding density | 5 nauplii/ml |
| Hatching efficiency | 100 000 nauplii/g |
| 2-t water | 2 000 000 ml |
| Nauplii required (2 000 000 × 5) | 10 000 000 |
| Hence, requirement is | 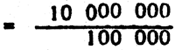 |
| = 10 g brine shrimp/2-t water |
In order to improve hatching rate as well as eliminating potential diseases that might be carried with the brine shrimp eggs, the eggs should be decapsulated first before hatching. The decapsulation can be done as follows:
Weigh required amount of brine shrimp.
Place cysts in hatching jar (conical plexiglass container). Add 1 200 ml seawater per 100 g of brine shrimp cysts. Aerate for 1 hour.
Add 1 000 ml NaOCl or CaO per 100 g of brine shrimp cysts. Stir thoroughly. Then add 25 g of bleaching powder per 100 g of brine shrimps cysts. Continue stirring. After 5–8 minutes, the temperature should become steady. During the process do not allow the temperature to increase above 40°C, if necessary using ice to bring the temperature down.
Continue the decapsulation by decreasing the temperature down to 30°C by adding ice. Add lime and bleaching powder in the same amount as given above. Stir until reaction is complete. At this stage the cyst should change colour from dark brown to white and orange.
Clean the cyst in a fine meshed strainer and rinse cyst very well with freshwater or seawater until the chlorine odour is removed. The cysts are now decapsulated. They may be fed directly to the shrimp larvae, or incubation can continue so that they hatch into nauplii.
If it is necessary to neutralize the chlorine, put the cyst in a solution of sodium thiosulphate (Na2S2O3, 5H2O). Add a concentration of 0.05 g per 100 g of Artemia cysts. Add 100 ml of water and stir for 2–5 minutes. The decapsulated cysts will sink to the bottom while the dirt and incompletely decapsulated eggs will float.
If the cysts are decapsulated in large quantities, they can be stored in concentrated brine (salinity of 300 ppt) or in refined salt (30 g NaCl/100 g Artemia cysts) until needed.
To obtain the high hatching rate the brine shrimp cyst should be hatched out as follows:
Place cyst in hatching tank (conical base) at density of 10 g/1.
For practical reasons, natural seawater is used as hatching medium. However, it has been demonstrated recently that at lower salinities (e. g., 5 ppt), the hatching rate increases and the nauplii have a higher energy content (Sorgeloos, 1980).
Maintain temperature around 30°C for maximum hatching efficiency and fastest hatching rate.
Maintain pH of hatching medium between 8 and 9. If necessary, Na2CO3 (1 ml of 0.5 m solution per litre medium) or CaO (65 mg/1) may be added to increase the buffer capacity.
Incubate for 20–24 h with continuous aeration. To obtain a maximum hatching efficiency an oxygen level close to saturation is recommended.
All cysts should be kept in suspension. Accumulation of cysts on the bottom tank creates anaerobic zones which interrupts the cyst metabolism.
To assure a maximum output expose the culture to a continuous illumination of about 1 000 lux. This light intensity is attained when the hatching container is placed at about 20 cm from a fluorescent light tube of 60 W.
After incubation, stop aeration to allow egg capsules to float. Cover the upper of the tank with black cloth to allow the nauplii to concentrate at the bottom.
Drain the nauplii into a strainer and rinse with seawater to remove any remaining empty eggshells.
Refill the hatching container with seawater to allow remaining cysts to hatch.
Feed brine shrimp nauplii to the larvae.
The freshwater Moina is a good food for seabass fry aged between 15 and 30 days old. It can be a substitute for brine shrimp. The Moina can also be produced in large quantities at low cost. The stock is also easily obtained from an aquarium shop or from local drainnage. For mass production of the Moina in an outdoor 25-t concrete tank, the following procedures proved successful at the Sg. Merbok hatchery.
Clean and disinfect the culture tank as necessary. Bring the water in at 25 cm depth (about 5 t of water volume). Add 15 1 of dried chicken manure and 5 1 of rice bran. Stir the tank thoroughly. On the 4th day about 500 cc of Moina stock is added. During this period, all mosquito eggs laid along the surface of water in the culture tank must be removed to minimize the competition in food between mosquito larvae and young Moina. Gradually increase water level of the tank at the rate of 10 cm/day. The amount of water added can be adjusted according to the growth of the micro-organisms and Moina in the tank. The bloom of the Moina will reach a peak at the 7th day or three days after adding the stock. A partial harvest can be made. The culture will last for three days. After the 10th day the population of the Moina will decline and preparation of the new culture is required.
![]()
![]()
![]()