![]()
![]()
![]()
PART 5: WHAT DOES OUR GARDEN NEED? |  |
The garden site |
| Objectives |
|
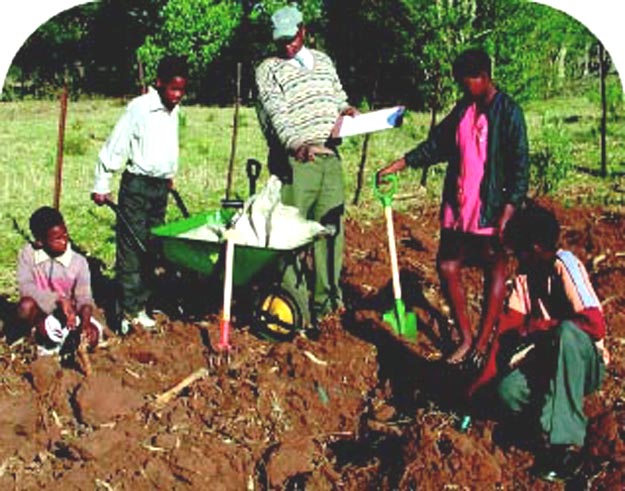
If you do not already have a garden, preparing the site may be the most expensive part of your project. Once you have identified and mapped your location, decide what needs doing, estimate the equipment and supplies needed, discuss how to plan and lay out the garden and organize the site preparation. This is the time when you will really appreciate voluntary help!
A. IMPROVING THE SITE
1. What have we got and what do we need?
Walk around the garden site with your colleagues. Take a map of the site with you to aid discussion and record observations. Start making a list of what you’ve got and what you need. Also find out about local practices and local resources and consult the Horticultural Notes where appropriate. Here are some points to consider:
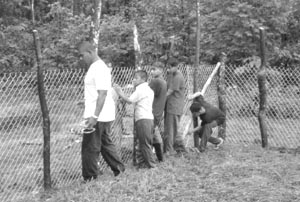
Protection against predators This is critical. A bumper crop is no use if it is eaten by the neighbour’s goats. What are the natural predators in your area? Chickens? Pigs? Wild animals? How do local people enclose gardens or protect a particular crop?Are there already good fences, hedges or walls to protect the garden? (See Protecting the garden in Horticultural Notes.) If not, can you create effective barriers? What will they cost in time and/or money? Will they need maintenance? Will the size of your garden be limited by the amount you can enclose? Will you need a night watchman to prevent theft?
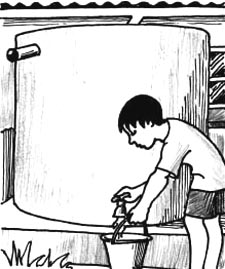
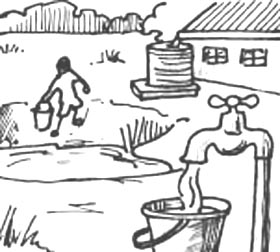
Water supply Water supply is also extremely important. Vegetables in particular take a lot of water. A good water supply leaves you free to decide when to plant and when to harvest. It must be reliable, clean, cheap and accessible. Where does your water come from? Can you rely on it? Is it available in the dry season? Will you need to budget for renewing pipes, pumps, cisterns or tanks? Who is responsible for maintenance of such equipment?
If water is scarce or expensive, can you improve the supply? For example, can you harvest rain water from roofs? Can you conserve water by using “grey water” from washing dishes and clothes? What kind of garden beds will be best? What crops flourish in dry conditions? What watering system will you use? How will you keep water in the soil?
If there is a risk of flooding or waterlogging, what kind of drainage will you need? What kind of beds will you make? What crops love water? How will you protect plants from heavy rains?
For all these questions, check the advice on Water management in the Horticultural Notes, find out the strategies adopted in your area and consult local agricultural experts.
Protection from the sun Plants need plenty of sunlight (at least eight hours a day). But in hot climates, some shade in the mid-afternoon is a help. Where will you put delicate plants? What can you use for shade (trees, walls, hedges tall plants, screens)?
Terrain Level ground is most convenient. Steep slopes need terracing, which is a big job.
If the land has already been cultivated, what crops were grown? You should not plant the same crop again soon (see Crop rotation in Horticultural Notes).
If it is virgin land, do you need to remove rubbish, roots, rocks, tough grasses?
What is there on the site that you can use? For example:
Perennial flowers and bushes have already shown they can survive. Use them for hedges, for fruit, for nature study, for attracting beneficial insects, or just for visual interest.
Established trees give shade for people, plants and compost; fallen leaves for compost or mulch; shelter from the rain and anchors for the soil.
If trees must be cut down, use the logs for seats or benches, or for boxing garden beds.
Natural ditches can be turned into ponds or irrigation channels.
A small mound can become a meeting point, a display area or a natural stage.
Existing paths are there for a reason. Keep them in place and plan the garden around them.
Stones and pebbles can be used for making walls, marking out or decorating garden beds and paths, making weather-resistant signs, lining drainage ditches, making natural seats.
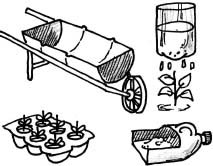
Some rubbish has uses - for example, old car tyres make good container gardens, swings and even walls; plastic bottles can become watering cans and buckets; bits of bark, branch and plastic can be used for garden signs.
Soil and drainage What kind of soil do you have? Get a soil analysis done by the local agricultural service. Get older students to repeat the analysis and see if they come to the same conclusions. The analysis will tell you about acidity, composition and chemicals.
Acidity If the soil is too acid, you will need to add lime; if it’s not acid enough, add sawdust, composted leaves, wood chips or peat moss.
Composition (the proportions of sand, clay, silt and organic matter). Generally you will need to add more organic matter to help with drainage.
Chemicals If there is a lack of nitrogen, potassium or phosphate, these can be restored with natural fertilisers (see Nutrients and fertilisers in Horticultural Notes).
Storage facilities You will need secure storage facilities somewhere to keep tools and equipment. A lock-up shed is ideal. Or can you use a storeroom in the school?
2. What do we need to do?
After this survey, you will have an idea of what needs special attention. Here are some of the actions you may need to take:
| Site improvement - decide what to keep - remove rocks/roots/bushes - kill perennial grasses and weeds - level the ground - establish fences/hedges/walls - dig drainage ditches - provide a secure garden shed | Water supply, water policy & irrigation system - improve and secure water supply - develop water management policy - establish watering/irrigation system |
| Soil improvement - do a soil analysis - add lime/natural fertilisers - dig over the soil - dig in compost/manure/green manure - start compost heap(s) |
If there are major works to be done, list them, prioritize them and estimate the cost in money and labour. Think how parents and the community can help. Also establish clearly any legal aspects related to investment in fencing, irrigation, drainage (e.g. repayments on loans, property and user rights, maintenance obligations).
B. BASIC EQUIPMENT AND SUPPLIES
What equipment and supplies have you got, what do you need and how can you get them?
Equipment To decide how much equipment you need, estimate how many people will be working in the garden at any one time. Children may also be able to borrow tools from home. Indeed, some schools manage without any tools or equipment of their own at all. Some tools and equipment can also be homemade - if so, make sure they are light enough for small children.
The list below shows the desirable basics for about 30 users. Use it to identify your immediate needs and to discuss equipment with students, families and your garden advisers.
Supplies Other supplies are seeds, saplings, cuttings, organic fertiliser. Some seeds can be saved healthy plants. Some plants (e.g. sweet potatoes and water spinach) can be propagated with cuttings: this makes for interesting lessons as well as cutting costs. Otherwise we recommend commercially produced seeds. The Ministry of Agriculture may help with supplies, or you may persuade seed producers, garden centres or traders to make donations.
C. PLANNING AND LAYING OUT THE GARDEN
Planning and laying out the garden is one of the most enjoyable tasks. Children should be fully involved in the process (see the lesson outline Garden layout at the end of the chapter).
1. Garden beds and other essentials.
The main elements of your garden are beds, paths, plant nurseries, compost heaps and a garden shed if possible.
Garden beds What type of garden bed do you want? For most situations we strongly recommend “permanent raised beds”. To make these you dig over the soil and add compost, then remove the topsoil from the paths and heap it up on the beds (see Garden beds in Horticultural Notes). The rule with permanent raised beds is: NEVER walk or kneel on them and compact the soil. If the soil is left alone it keeps its structure, does its work better, and (best of all) needs very little cultivation. Raised beds require quite a lot of work at the beginning, but much less later on. They are easy to maintain, easy to work with, highly productive and excellent for improving the soil.
Where? Try to give all parts of the garden easy access to water. If there is a slope, make beds across it to catch water and prevent erosion. If possible, put class plots near to the classroom window. This helps to keep an eye on crops, livens up lessons and scares away predators.
How big? Children must be able to reach every part of the bed easily without standing on the soil. About 0.6 m wide is good for small children, 1 m for bigger ones. The length depends on how much land you have, how many plots you want and how much you plan to grow. 1m is a good length for small children, 1.5 m (the “doorsize garden”) is big enough for most learning purposes, while 10m is a standard length for commercial production.
What shape? Rectangular beds are the easiest to manage, but there is nothing wrong with crescents, circles, triangles, letters of the alphabet, or any other shape, provided children can reach the plants without standing on the bed. You may want to use conventional rectangular beds for the main production and have a few odd shapes for fun or for decoration. Consult the children.
How many? The number of beds depends on how you organize the work (see Part 10). Have at least one bed for each class. Motivationally it is even better to have one bed for each small group, with some small individual plots for experiments, demonstrations or rewards.
Paths/walkways Plan to have paths all round the beds, 1m wide, to allow for wheelbarrows and children passing - there is a lot of traffic when a whole class is working. Let other paths find their own way. If there is a lot of traffic, earth or grass paths will maintain themselves.
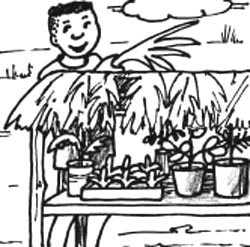
Plant nursery Seed beds need shade and protection (see Part 8). One way to protect seedlings is to grow them on a table. They can be shaded with a frame roofed with fronds. A table is also useful for re-potting plants, drying seeds, writing out labels, etc.
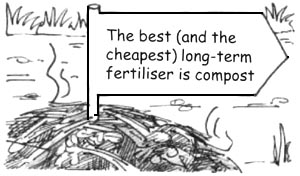
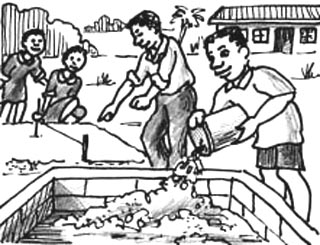
Compost heaps Locate compost heaps in several places fairly near to the beds (under trees is convenient), and leave some space for storing mulch. Special compost bins or containers are useful but not essential (see Compost in Horticultural Notes).
| In some Uganda rural schools they use the existing rubbish pits for compost, adding a little soil. Children bring from cows, chickens and wild animals to add to compost. |
| (C. Ssekyewa, personal communication, 2003) |
2. Optional extras
While planning, discuss what other features you might want some day in the garden. For example:
For gardening:
- a demonstration or experimental plot
- a crop drying or processing area
- a scarecrow or other kind of bird scarer
- a woodlot of dense bush or trees2
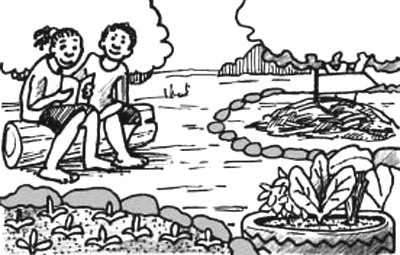
For social life, study and play:
- a central courtyard for meetings or performances, with places for spectators to sit
- tables, benches, logs, rocks for sitting, eating, reading and writing garden journals
- a ball wall
- a grassy communal area for sitting, playing, having outdoor lessons or meetings
- swings, seesaws and other games
For cooking:
- a cooking area and outdoor oven
For sales:
- a stand or stall for serving/selling garden produce
For information:
- a weatherproof bulletin board
- a weather station (thermometer, barometer, etc.)
- a map or plan of the garden on display
- labels and signpost
For decoration
- some outdoor art
- an entrance arch
- ornamental bushes and flowers
For environmental studies:
- a wildlife habitat
- a bird house or bird table
- a pond
3. Special garden designs
Special garden layouts often don’t require additional work. And they can be decorative and stimulating, may carry symbolic messages and give practice in mathematics and measuring. Here are some special garden designs you might like to try:
The Three-A-Day patch consists of a papaya tree with cabbages and carrots around it. It encourages children to eat three fruit or vegetables every day.
The Vitamin A garden has pumpkin, carrots, sweet potatoes, dark green leafy vegetables, and a papaya tree. It aims to make children aware of fruit and vegetables rich in vitamin A. (Adapted from Kiefer and Kemple, 1998)
The Square-Foot Garden, for where space is limited, is just 1m square and is divided into nine squares, each with a different mini-crop. (Guy et al., 1996)
The Dryland Garden consists of sunken beds to keep water in, protected with windbreaks or fences of sticks and planted with plants which are drought-resistant - e.g. green and black gram beans, roselle, amaranth, okra, mango, grapes, jujube.
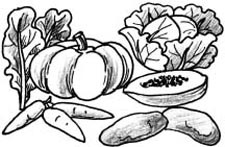
Food from the Vitamin A garden
4. Signs and labels
Making signs and labels for the garden should be part of students’ garden work every year. They may give names, directions, information about plants, food values, sponsors and so on. They revise learning, exercise literacy, and keep everyone in the garden informed. Give the task of sign writing to class artists, deserving pupils or group leaders as a special responsibility. At the end of the season most of the signs should be removed, to be renewed in the next gardening season.
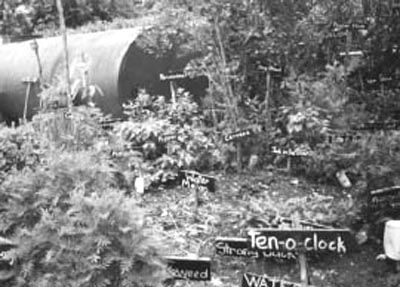
Photo courtesy of C. Power, Sligoville school, Jamaica
Garden signs should be fairly durable, but do not need to last more than a season. Use unwanted rubbish that will stand the weather - wood, horn, bone, stones/rocks/pebbles, string, rope, cane, old car tyres, bits of plastic sheet, aluminium strip, sticks and twigs, gourds and calabashes, plastic bags. You will also need a hammer and nails, some good strong glue, oil paint, paraffin and a small paintbrush (or pieces of fibrous wood). A small blowtorch is useful for burning letters into wood, bone or gourds - or you can use a hot poker.
For special occasions students can put up temporary labels with information about food value, history, projects, class involvement, etc. Use brightly coloured paper and pens.
D. STUDENT INVOLVEMENT
School students may not be able to do all the work needed to establish a garden, but they should be involved as much as possible. They can participate by:
mapping and studying the site;
discussing and researching supplies and equipment needed;
observing and recording garden works;
guiding visitors round the site and keeping families informed;
studying garden layout and garden beds;
labelling and signposting the garden.
All these make interesting lessons. While the site is being prepared, it is also a good time to have lessons on soil and water, tools and equipment and to chart the progress of the compost heaps.
 | SUGGESTIONS FOR ACTION |
Get students to sketch, photograph and describe the garden site.
List what needs doing and estimate costs.
Make an inventory of existing equipment, and another list of equipment needed, with costs. Get students to help in finding out prices of equipment needed.
Find out the legal situation regarding ownership and maintenance of garden equipment
Consult the Garden Group about who can help with the necessary work and equipment.
Brief older students on what the site needs. Prepare them to conduct sponsors, volun teers, parents, the garden group, and other children around the site, either one by one or as a group.
Consult local gardeners about garden layout, then discuss and decide what is feasible in the school with staff, students and families. Plan the garden layout with the students.
Display the planned layout in the school, and put a copy in the Garden File.
Outputs: Pictures and description of existing garden site
List of main works required, with estimated costs
List of essential equipment and supplies, with estimated costs
Garden layout plan
A team of student guides
| TIPS AND IDEAS |
|
 |
| Get pupils to label and signpost all features of the garden as they are established. Then have them organize a quiz for other students about the garden. |
 | IN THE CLASSROOM |
| Preparing the ground Children should be involved in choosing, planning and preparing the site, even if they do not do the heavy work themselves. These lessons encourage them to evaluate garden resources, understand site preparation activities, plan garden layout and start creating garden beds. |
1. Tools and equipment Children need good routines for using and storing equipment.
Objectives Pupils recognize common gardening tools and how to use them; care for tools properly; can tell others what to do; and decide how to implement garden rules. Older pupils can help with purchasing by researching the market and identifying good quality tools and best buys.

Activities Pupils handle garden tools, say what they are for and demonstrate how to use them if they can. For each tool, the teacher calls for ideas on (a) how to leave it so it won’t be dangerous (e.g. hoes with “head in air”), (b) how to prevent it from getting rusty (e.g. buckets upside down, trowels in bucket of sand), (c) what to do after using it (clean it and put it back). The class discusses a code of conduct for equipment - e.g. Put it back in the right place! Stand rakes up! and decides if they can remember the rules or need to write them up. Volunteers undertake to brief those who are absent.
2. Water management For areas where water is a problem
Objectives Pupils know the sources of gardening water, appreciate the need to conserve water and have some ideas how to do it.
Activities Pupils respond to the following questions:
Where does our school garden water come from? How does it get to the school?
Could we get water from anywhere else (e.g. rainwater harvesting, making ponds, using “grey water” from washing and cooking)?
How can we use less water (e.g. mulching, composting, drip irrigation)?
How will we get the water to the plants (e.g. hose, watering can, bucket)?
Older pupils explain and elaborate their suggestions. Pupils follow up by making a map of the water supply or irrigation system, or taking (and then giving) a guided tour of the school water system.
3. Preparing the site Involve children in site preparation planning and activities.
Objectives Pupils have a clear picture of the garden site, recognize what needs doing and are able to interpret site preparation activities.
Activities Pupils walk round the garden site observing and describing the main features, existing plants, contours (slopes and bumps) and facilities (e.g. tap, shed). They discuss what to do with rubbish; trees, bushes, grass and weeds; bumps, hollows and slopes; rocks and stones; whether there is a need for fences/hedges, what the soil needs, what to do about water supply and where the garden beds should be. Older students make a map of the garden incorporating proposals and prepare to present ideas to other classes or visitors. To follow up, pupils explain what needs doing to their families, and record site preparation activities in drawing or writing.

4. Protecting the garden The battle against animal predators is an exciting area of action.
Objectives Pupils recognize the main predators and know how to protect the garden against them.
Activities The teacher tells a story about child gardeners and how they frustrated predators, or draws/ shows a predator and a plant and asks pupils to explain the danger and how to prevent it. The class collects more examples of local predators from families and local farmers (see Protecting the Garden in Horticultural Notes) and record what they eat, what they do (e.g. climb, burrow, fly, scratch) and how to stop them. They find signs or threats of predators in the garden and implement practical measures against them such as hedges, walls and fences. Use their findings to build a classroom dramatization of the battle for the crops, or make a poster.
5. Garden layout Children should be involved in planning beds and paths in a new garden.
Objectives Pupils recognize essential elements of garden layout, and contribute to layout planning.
Activities The class discusses what is needed in their new garden (e.g. plots, paths, signposts, flowers, shed, taps). They inspect the garden, discuss and decide:
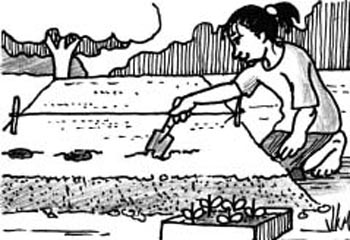
Older students mark out the site with pegs and string and make a scale plan. Older students may like to sketch the proposed layout on a garden map (see Part 4).
6. Garden beds Permanent raised beds are productive, convenient and good for the soil.
Objectives Pupils understand how beds provide what plants need, learn not to walk on raised beds, can describe the kind of beds adopted by the school and know how to make them.
Activities Pupils recall what plants like - no competition, good soil (rich, damp, airy, firm, full of life) and recall what they know about topsoil and subsoil. Using a prepared slice of soil, the teacher demonstrates in miniature how to make raised beds. S/he divides the “bed” from the “path”, digs over the bed, adds compost, waters it and lifts the topsoil from the path onto the bed. Pupils discuss how these beds will be full of air and life and should not be disturbed by walking or kneeling. To follow up, pupils help to prepare garden beds, and explain their advantages to visitors.
![]()
![]()
![]()