![]()
![]()
![]()
Maria Celeste H. Cadiz, Ma. Theresa H. Velasco, Ma. Rovilla C. Sudaprasert, Oliver Carlo T. Castillo, and Bernabe M. Remoquillo
This chapter is intended to enable you to:
1. Discuss the dimensions of an NRMA message;
2. Explain how to develop and produce effective communication materials on NRMA;
3. List and describe the different types of communication materials that can be used in communicating NRMA;
4. Discuss basic pointers in producing selected communication materials;
5. Discuss essentials of pretesting communication materials;
6. Discuss pointers in basic handling and care of communication media equipment; and
7. Prepare a message and media concept of a communication material on NRMA.
Once a relevant communication program for NRMA has been designed for specified localities, ICS planners can begin developing messages and materials for the planned intervention. As in strategy design, NRMA users may be involved in this process.
DIMENSIONS OF AN NRMA MESSAGE
In participatory message and materials development, the change agent can start with making sure that s/he and NRM users who will be involved in developing NRMA messages and media materials have a common understanding of the following six dimensions of a message:
1. Appeal - the benefit or value associated with the message, such as:
Concern for the environment
Love for future generations
Responsibility
Happiness
Bright future
Sense of family
Importance of healthy lifestyle
Peace of mind
Control over the future
2. Approach - how a subject is presented, whether humorously or seriously; directly or indirectly; rationally or emotionally; or a combination or blend of approaches
3. Content - what is being presented or conveyed; the main idea or behavior being promoted
4. Text or image - form of the message as copy, script, slogan, illustration, graph, photograph
5. Context - special characteristics of the media environment in which the message is conveyed, such as occasion and physical setting if relevant
6. Source - from whom the message comes from, whether a person or organization, which can affect its credibility
SEVEN CS IN DESIGNING EFFECTIVE MESSAGES
Before starting to develop NRMA messages and materials towards attaining the communication objectives set (discussed in Chapter 4) the message developers should bear in mind seven pointers in preparing "artful" messages, or messages that bear an impact on their audiences.
These pointers are more easily remembered as the "7 Cs" (as in seven seas), as follows:
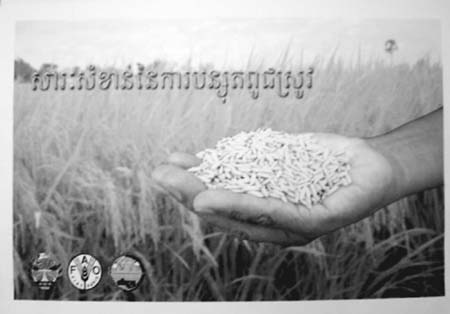
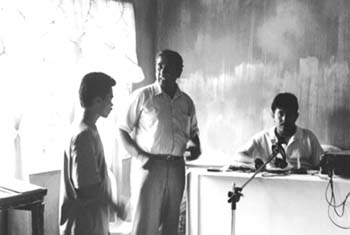
1. Command attention. Among many distractions and stimuli around, a message must be compelling enough to stand out and be noticed. In a poster or flipchart, the size of a picture or illustration and letterings, as well as color and contrast attract attention. Messages composed in a witty or creative manner also catch attention. For example, a video produced in Cambodia by the Community Fisheries Development Office (CFDO) of the MAFF Department of Fisheries used a humorous approach with a popular comedian as lead actor.
It is important to remember, however, that in catching attention in a creative manner, a message remains culturally appropriate, politically correct, and socially acceptable.
In short, it should not contain any element that may offend sensibilities of the audiences of the NRMA communication material.
2. Have a clear message. Messages should be simple and direct, eliminating unnecessary clutter in images or words. A message won't be remembered if it is not understood. For example, instead of saying, "Natural fertilizers keep the soil healthy to produce a healthy crop", a poster may simply say, "Use natural fertilizers." Further elaboration and explanation may then be added in smaller font/letter sizes.
3. Communicate a benefit. An audience should clearly see what they can gain from following a prescription like using natural fertilizers. For example, a poster with such a message may show the satisfied farmer who uses natural fertilizer and showing samples of his harvest from healthy plants.
4. Be consistent. People learn by repetition. A message may be repeated in different ways by presenting them in different media materials as well as in interpersonal communication. However, care should be taken that several messages do not unintentionally contradict and cancel out one another. For example, something in the picture might be inconsistent with the verbal message, as in a poster promoting fishing practices allowed by law but showing the illegal practices.
5. Cater to the heart and mind. NRMA messages and materials can be given a human touch using an emotional appeal or tone. This is as important as facts and good reasoning, which appeal to the mind.
6. Create trust. People will believe and be convinced by a message that is based on facts.
7. Call to action. Because the aim is to change or affirm users' awareness, knowledge, attitudes, and practices in NRMA, NRMA messages and materials should directly ask the audience to do something.
|
|
PARTICIPATORY DEVELOPMENT OF NRMA MESSAGES AND MATERIALS
Developing NRMA messages and materials proceeds through the following steps, made participatory when NRMA users in a community are involved in each step:
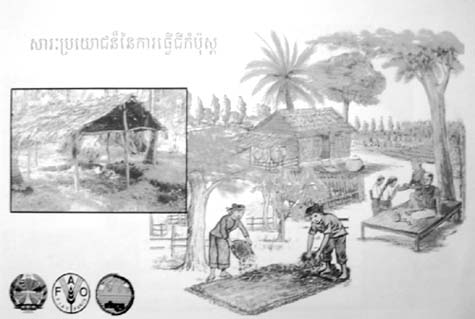
1. Develop a message concept. In developing posters appropriate to a particular rural audience, a change agent approached the villagers by saying, "I can teach you, if you teach me first" (Maglalang, 1976). He then asked villagers to draw for him, no matter how crudely, how they would explain family planning principles to their fellow villagers. What resulted were a series of posters that portrayed different family planning concepts using an analogy to farming concepts and practices. The final images used were refined by artists, pretested with villagers, and further refined based on the pretests. But the original concepts and images used came from the farmers.
The same approach may be used in involving farmers and fishers in developing message concepts in NRMA. The change agent may ask them to teach him/her first how they would explain to their fellow villagers difficult NRMA concepts, like the "give-and-take" relationship between humans and natural resources.
The message concept is also known as the overall creative context in which the key message is presented, referred to as "the big idea" in large advertising campaigns.
Towards developing the message concept, the message developer should:
a. Know what message device to use. Developing the message concept first involves selecting an appropriate device or way of convincing an audience to change their behavior. For example, advertisers use the following ways:
Giving an idea a bad label
Associating something with a "virtue word"
A respected person says that a given idea/program/ product/person is good or a hated person says that it is bad - carries the authority, sanction, and prestige of something respected and revered over to something else to make the latter more acceptable
"Everyone is doing it!"
Method by which a speaker attempts to convince his audience that he and his ideas are good because they are "of the people"
Involves the selection and use of facts or falsehoods, illustrations or distractions and logical or illogical statements to give the best or worst possible case for an idea, program, person, or product
b. Pretest the message concept. Present the message concept to peers to test for their reactions and get comments and suggestions on making it more effective. It would even be better if the message concept is pretested with NRMA users as well.
2. Design a message for a specific material based on the concept. This involves writing a script or text for the specific NRMA communication material. For example, a poster may have the following headline: " Make your village pesticide-free!"
3. Pretest the message with the intended users. As done with the message concept, pretesting involves trying out the message with representatives of the intended users of the NRMA materials to check for their reactions. This is also to make sure that they have no unintended contradictory or distracting reactions. Based on users' comments and suggestions, the message developer should revise and refine the message.
4. Develop the storyboard. The storyboard is the proposed visual presentation of the message. For printed materials (e.g., leaflets and posters), these are already the prototype materials. Appropriate images should be selected for the storyboard or prototype. This is again pretested to check for user reactions that may counter the objectives of the communication material. For example, pretesting a leaflet with an illustration of a farmer's face on the cover drew protest from one farmer. He questioned why artists always portray farmers as haggard, old, and in his words, "ugly". Comments such as these guide the message developer on revisions that are needed on a prototype communication material.
5. Produce final materials. Once pretests of revisions no longer elicit contradictory reactions from NRM users, the communication material may be finalized and reproduced.
6. Distribute materials. All the expense in developing and producing a communication material is fruitless if they are not distributed and used.
|
|
|
|
TYPES AND USES OF COMMUNICATION MATERIALS
There is a wide range of possible materials that can be used in communicating NRMA with fishers, farmers, and other NRMA stakeholders. These may include objects and specimens; printed materials such as leaflets, brochures, handbooks, and newsletters; visuals and audiovisuals such as posters, displays, bulletin boards, audiocassettes, and video; the traditional mass media including radio and television; and alternative community media like audio towers/ public address systems, drama, and other folk media. Their uses in communicating NRMA are outlined by Cadiz (1991, 2003) as follows:
1. Objects and specimens. Real objects and specimens, if readily available, are useful in demonstrations. If they can be preserved without altering their physical properties, they are useful for repeated use and review.
This is if their availability is highly seasonal. For example, specimens of friendly insects and insect pests can help farmers distinguish which insects they find in the field are harmful and not harmful to their crops. Specimens of diseased plants can also be used to identify the symptoms of plant diseases found in the locality.
2. Publications/printed materials. For NRMA users and stakeholders who do not know how to read, publications will not be highly useful unless they are full of pictures or drawings and contain only a little text. On one hand, they are useful reference materials that help extension workers and literate NRMA users because publications can explain ideas and practices comprehensively, depending on the type of publication.
Leaflets are single-sheet materials folded in various possible ways. They are useful in explaining or presenting briefly a simple NRMA idea or practice. Brochures or pamphlets are made up of more pages, while a handbook is thicker, about 20 pages, and can be more comprehensive. All are useful in showing and explaining procedures or "how-to" topics, especially when properly illustrated with drawings and pictures to show ideas more concretely and clearly. Of course, the most comprehensive "how-to" publication is the manual. Meanwhile, newsletters help provide updates on NRMA developments and may be a useful way by which literate farmers or fishers from different localities can regularly exchange information about their respective practices, experiences, and lessons learned.
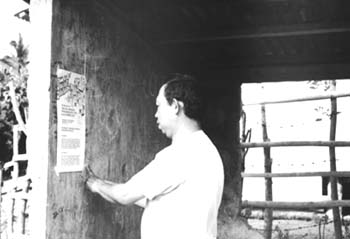
3. Visuals and audiovisuals. Visuals and audiovisuals appeal to the senses of sight, hearing, or both. Posters and billboards are prepared in an eye-catching manner using pictures, color, and large texts. They present one complete idea briefly so that viewers will get the whole message quickly while passing by it. To be effective, they must elicit action by either telling viewers to do something or making them think about an issue. Billboards are larger versions and usually made of more durable materials for people in transit to see. Meanwhile, displays or exhibits can present more details about an NRMA idea or practice using pictures, text, and sometimes, real objects and specimens.
Bulletin boards can also be used to mount displays on, and their contents may be updated every now and then. The bulletin board may have regular sections for each category of information, such as community news and events, NRMA basic information, new research findings, and the like.
Audiocassettes, meanwhile, can substitute for radio programs when radio signals cannot reach NRMA users or no local radio station exists to air local material. They are useful for NRMA users do not know how to read because they can listen to detailed explanations of an idea or practice from experts and extension workers. An advantage of audiocassettes over radio is that the user can listen to and replay them anytime they want. They may be used together with illustrated printed materials so that NRMA users can see aside from hear the idea or practice being described. Finally, video is a popular way of learning about NRMA because of the moving images synchronized with explanations/narrations, music, and sound. They catch users' attention and interest especially if the NRMA ideas and practices are weaved in a realistic story.
4. Radio and television. Villagers like to listen to radio and watch television if they can. They use these mass media primarily for news and mostly, for entertainment. Development agencies often use these government radio and TV stations to create awareness of and interest in their respective programs, as well as generate support for them. However, these mass media are often too expensive to use if the radio and TV stations will charge for the use of their air time. Likewise, radio and television program production requires broadcasting, performance, and broadcast production skills.
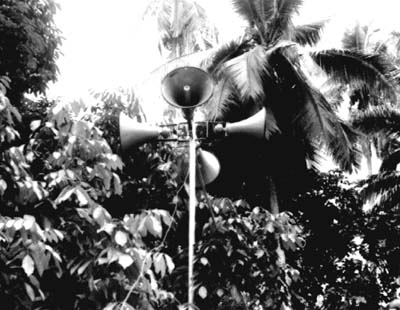
5. Alternative community media. Examples of alternative community media include audio towers/public address systems, drama, and other folk media. Audio towers use karaoke players connected to trumpet loudspeakers that are mounted on a steel pole or tower. These can serve as public address systems where instructional audiocassettes on NRMA may be played for community listening.
Or, an ongoing lecture by an expert in a farmers' or fishers' class may be amplified for people to hear from their own houses. Village councils in some Philippine villages manage audio towers. They are used as a means to disseminate community news and relevant information that can help in people's livelihoods or sanitation, health, and nutrition practices. Drama and other folk media are also useful means by which villagers can express their own views and beliefs about their natural resources. These media can appeal to people's emotions in order to move them to act.
|
|
|
|
MAKING LEAFLETS
As printed materials, leaflets use a lot of text in explaining NRMA ideas and practices. Thus they must be written well.
In writing the leaflet, the UPLB CDC Department of Development Journalism (DDJ) (2003) reminds leaflet developers to:
1. Cover only one main idea or problem.
2. Make an outline of what s/he wants to say.
3. Plan the form, size, and shape of the leaflet, and the color and illustrations to be used in it.
4. Organize the contents of the leaflet, ensuring an easy flow of related ideas using appropriate transitional phrases.
5. Present the contents of the leaflet using short, simple sentences; short paragraphs; enumerations or bullets; and subheads. Key points should be emphasized so that readers can quickly get and remember the main ideas.
6. Use the "you" approach, which presents the information in a simple and direct manner.
|
|
Types of Leaflet Titles
An appropriate and catchy title of the leaflet helps get the readers' attention and gives a quick idea of its contents. The leaflet title may be any of four types, as follows (UPLB CDC DDJ, 2003):
|
TITLE TYPE |
EXAMPLE |
|
1. Statement |
Natural Fertilizer Improves the Soil Good Nutrition is Not Expensive |
|
2. Question |
How Useful Are Natural Fertilizers? Dwindling Fish Catch? |
|
3. How-to-title |
How to Culture Tilapia Easy Ways to Raise Pigs |
|
4. Suggesting/ commanding |
Save our Forest, Save the Trees Befriend Your Friendly Insects |
Distributing Leaflets
Beyond designing and producing the leaflet, it is important that people it is intended for read it and follow its instructions. Distributing them properly is one key to making sure that the leaflet is put to good use. Persons who are assigned to distribute leaflets should blend well with the people and be dressed in a usual way (UPLB CDC DDJ, 2003). They should:
1. Establish eye contact with people who are approaching and smile at them;
2. Hold leaflets so that the title can be clearly seen by passers-by;
3. Say a short phrase like, "this explains why we're here today" when handing a leaflet to somebody who isn't talking to somebody else;
4. Avoid having long conversations or getting into arguments, as the aim is to hand out leaflets. Offer to talk to people who are really interested later; and
5. Pick up leaflets that people have thrown away before leaving an area; it reflects badly on a cause if it is seen littering the street.
MAKING POSTERS
A poster puts together line, color, and words in order to catch and hold a viewer's attention long enough to communicate a brief message (UPLB CDC, 2003). It should:
1. Catch attention;
2. Inform and motivate;
3. Be remembered; and
4. Make the viewer want to act.
|
|
A poster must be simple; attractive; contain messages that are quickly and clearly understood; and have good composition, color, and technique.
Parts of a Poster
A poster has five parts:
1. Illustration and/or photograph which attracts viewers' attention and at the same time gives a message.
2. Title or headline which briefly says the main idea or message of the poster, such as "Save the Lake"
3. Words that explain further or support the main idea of the poster
4. Open space which provides resting space for the eyes and allows them to move or focus only on the main parts of the poster
5. Logo and logo type or the symbol and name of the organization that produces the poster for identification purposes. This is optional.
Characteristics of Good Posters
The UPLB CDC (2003) describes a good poster as having the following characteristics:
1. It has a main idea. This is the most important content of the poster. This tells the main message so that it is remembered easily. It should lead the viewer to act.
2. It is interesting. The poster must be attractive and keeps attention long enough for the viewer to get the message.
3. It is simple. In just one glance, a person must be able to see the whole design of the poster. It should not have unnecessary detail.
4. The message should be short enough to be read easily.
5. The words must be readable. Letters must be large, simple to read, and bright enough to be seen at a distance.
6. It must be familiar to the viewers. They should be able to identify themselves with the situation shown in the poster.
7. Its color should be pleasing to the eye.
8. It should be original or present an idea in a new way. This makes the poster interesting.
Steps in Developing Posters
To develop the main idea of the poster, you must determine (UPLB CDC, 2003):
1. Who your main intended viewers are. Are they fishers or farmers in a specific village or district? Are they other NRM stakeholders, like household dwellers and local officials? What is their literacy level? What kinds of pictures will appeal to them?
2. The objective of the poster. This tells what action is desired of its intended viewers. Write down this objective or desired action, specifying the main intended viewers.
3. How, when, and where the poster will be used. This will help you decide what kind of material is needed in making the poster. For example, it should be made of thicker paper if you expect the poster to be displayed for a whole year so that it will last long. It should be large enough if you expect a number of people to look at it at the same time.
Being clear on the intended users and objectives of the poster and how, when, and where it will be used, the poster may be designed following the steps below:
1. Make preliminary thumbnail sketches in developing alternate designs of the poster. Include choices of color, other visual elements, and type of illustration or photograph.
2. Decide on the type of poster, whether it will be a single-glance poster or a stop and- study poster; a word/text poster a picture poster, a graphics poster, or a symbolic poster.
3. Write the headline and minimal texts that will give the message of the poster. Make sure these are written in correct grammar and in a way that catches attention. It may take the form of a command, question, positive statement, suggestion, news headline, or other creative statement. Make the headline short, catchy, and easy to remember, using action words.
4. Acquire the needed materials and produce the prototype poster. The prototype poster is the first finalized copy of the complete poster. It is ready for reproduction. Before multiplying it into the desired number of copies according to the number of users, it should be pretested. Pretesting is discussed in a latter section of this chapter.
5. Display the poster. The poster may be intended for use in facilitating learning in a farmers' or fishers' class; as a reminder to be glanced at indoors or outdoors; or as a stop-and-study poster that the viewer can reflect on.
If posted indoors, it should be placed at eye level. If posted outdoors, it should be posted high enough to protect it from vandals and to be visible at a distance. Enough light should be available where it is posted to make sure that it can be seen and read properly. Also, it should be placed where harsh weather will not easily destroy it.
In all these points of decision-making, the developer of the material must bear the viewers in mind.
MAKING VIDEOS
Making videos is a complicated process. According to Castillo (2003), making videos is composed of many steps grouped into three phases: pre-production, production, and post-production. He describes how to go about these three phases of making videos in this section.
|
|
Pre-Production
Video pre-production has eight steps, as follows:
1. Audience analysis - determining who are the main intended viewers of the video and their characteristics, including age, sex, social class, educational attainment, occupations and concerns, prevailing attitude, and other characteristics as may be relevant to how they will receive the video presentation
2. Need assessment - the reason why a video presentation is needed for the intended viewers
3. Objective setting - determining the desired change in knowledge, attitude, or practice in the audience which the video presentation will aim for
4. Scriptwriting - preparation of a detailed written plan of the video presentation
5. Distribution planning - deciding on how the video presentation will be distributed to its intended users and viewed by them
6. Budgeting - determining the funding requirements of the video presentation and how much of these funds are available
7. Team building - orienting and preparing the video production crew and talents so that they can work smoothly together
8. Developing a shooting schedule - preparation of the timetable of activities in all three phases of the video production process so as to coordinate everyone's involvement
|
|
The Video Production Script
A video production script is a written plan of its presentation. It describes the presentation, instructs the video cameraman and other persons involved in the production, and provides other information to guide the production. The script gives an idea on paper what will be seen and heard in the video. Preparing a video script before shooting the video footages helps make sure that ideas presented in the video are well-organized.
There are four types of video presentation that a scriptwriter may develop, depending on its purpose:
1. Informational videos raise awareness and promote understanding of an idea by providing information and explaining a topic.
2. Motivational videos focus on promoting an attitude about a topic.
3. Instructional videos present procedures on doing things.
4. Any combination of the above three types of vide presentation is also possible.
Scriptwriting Process
Writing the video production script proceeds through the following steps:
1. Preparation of a script plan - a one- to two-page write-up that includes a description of the topic of the video; its intended audience; the objectives of the video; its topical outline, and its treatment.
2. Selection of the video treatment - a short paragraph that describes whether the video will explain the topic using straight narration, the "you" approach, dialogue between two or more narrators, dramatic presentation, the documentary approach, or abstract or symbolic approach.
3. Writing the narrative script - describes in paragraph form how the video opens or introduces the presentation, develops and explains the topic, then closes or concludes the video presentation.
The introduction of the video establishes its mood or setting and introduces its theme or title. Meanwhile, the body of the video explains or presents the argument or development of the ideas in a logical manner.
The presentation may follow any of the following sequencing of topics: chronological or time order, spatial or place order, general-to-specific order of ideas, specific-to-general order of ideas, cause-effect order, or problem-solution order.
Finally, the closing part of the video summarizes its major ideas, presents recommendations or proposals, presents ideas for the viewers to think about, and indicates the end of the presentation.
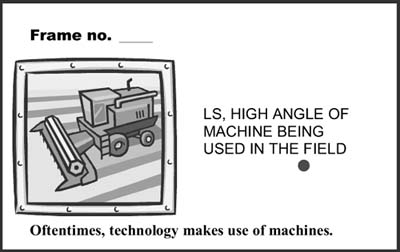
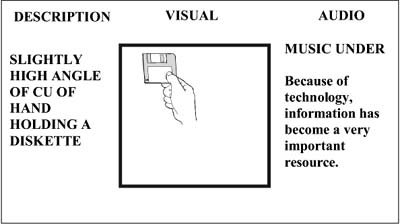
4. Preparation of the two-column or three-column script or storyboard - This script is prepared in two columns, one column each for the video (seen part) and audio (heard part); or in three columns, where a third column includes the description of the video (seen part).
The storyboard is the visual form of the script. It is a series of sketches showing segments of proposed video presentation.
The visual script also indicates how the scene is composed as a picture; the type of camera shot taken (long shot, medium shot, close up; high, normal, low angle; and video camera techniques like panning, zooming in or out, cut, etc.); and other details to describe the scenes.
Likewise, the "seen" part of the script indicates where still photographs, illustrations and graphics, and text will be used.
The video scriptwriter may use any of three formats of the storyboard, as shown below (Castillo, 2003):
|
Paper slip or card |
|
|
|
|
|
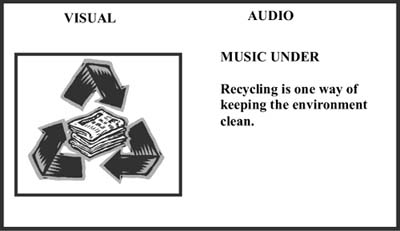
Two-column frame |
|
|
|
|
|
Three column frame |
|
In helping the scriptwriter develop the visual part of the video script, s/he can start by identifying the main ideas of the narrative script, then looking for keywords or phrases that should be translated into pictures.
In doing so, s/he should think in terms of pictures rather than words. S/he can then make rough sketches of the main ideas and select the best that would represent an idea. Clear descriptions of the images should be provided.
In writing the "heard" or audio column of the script, the scriptwriter should use few and simple words, short sentences, and short paragraphs. The video is mainly a visual medium and explanations in words should merely support or add explanation as needed.
What can be seen on the video does not need elaborate explanation. Thus, each idea should be shown in terms of pictures and drawings as much as possible.
Aside from the narration, the video scriptwriter should include instructions for using music and sound effects.
These are written in all caps. These instructions include the following:
INTRO MUSIC - music piece used in the introduction of the video
MUSIC UP - the volume of the music is at the same level as that of the narration, played such in between pauses in narration
MUSIC UNDER - the volume of the music is low enough so as not to compete with the narration; it only serves as background music
MUSIC FADE IN - the music volume starts from zero then gradually increases to the desired level (whether UNDER or UP)
FADE OUT - the music volume gradually decreases to zero
MUSIC SNEAK IN - similar to MUSIC FADE IN, but the increase in volume is even more gradual and is not noticed
MUSIC SNEAK OUT - similar to MUSIC FADE OUT, but the decrease in volume is even more gradual and the FADE OUT is not noticed
MUSIC SEGUE - first music piece fades out to zero volume and the next music piece fades in from zero volume starting at the point when the first piece reaches zero volume
MUSIC CROSSFADE - as the first music piece fades out, the next one fades in at the point when the first piece has not yet reached zero volume. Thus, there is a point when the two music pieces are both playing at low volumes, one fading out as the other fades in.
MUSIC/SFX MONTAGE - montage means an assortment of elements, in this case music and sound effects, put together in succession.
MUSIC OUT - turning off the music
EXTRO MUSIC - music at the conclusion of the video.
PRODUCTION AND POST-PRODUCTION
The actual video production involves rehearsing the scenes especially where talents will be involved; shooting the video footages following the script; and obtaining additional video and audio inserts from available sources.
Meanwhile, post-production involves the following eight steps:
1. Shot listing - preparation of a list of all the scenes or footages taken and their location as indicated in the video counter or log of the video player
2. Transcribing interviews - putting in writing word-for-word all the interviews taken, particularly those that will be used in the video presentation
3. Determining interview cut-points - identifying the specific parts of interviews that will be used in the video presentation and those parts that will not be included, specifying exactly where they will be cut
4. Digitizing/capturing - translating analog video images to computerized images if the camera used is not digital
5. Video editing - putting together the selected video images and footages along with the audio component in smooth, properly synchronized, and logical sequence to make a coherent and effective video presentation
6. Pretesting - showing the "draft" video presentation to its clients and sponsors to test for their reactions and solicit their comments and suggestions. Based on pretest results, the video presentation is polished as needed.
7. Distribution - delivery of the video presentation to its intended users.
8. Evaluation - systematic investigation of how the video presentation achieves its objectives of bringing about desired change in knowledge, attitude, or practice of intended viewers.
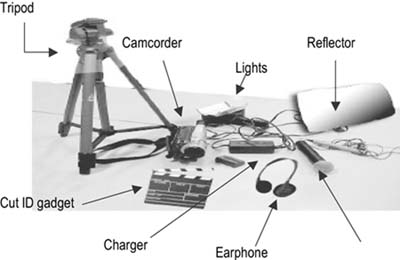
BASIC VIDEO PRODUCTION EQUIPMENT
Castillo (2003) presents the following illustrations to show the basic video production and postproduction equipment.
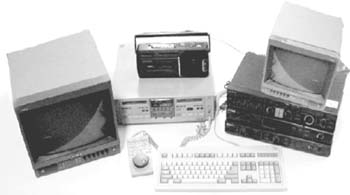
Linear Editing Machine (Castillo, 2003)
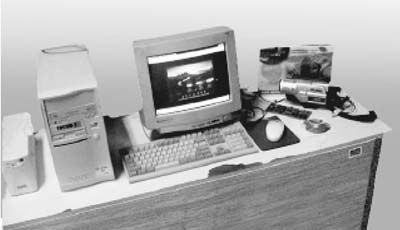
Non-Linear Editing Machine (Castillo, 2003)

Parts of a Camcorder (Castillo, 2003)
POINTERS IN SHOOTING VIDEO FOOTAGES
Castillo (2003) reminds video camera persons to make sure that the video footage has:
Clear sound;
Proper lighting;
Steady shots;
Good composition; and
Sensible camera movements.
Good composition means that the main subject occupies a substantial part of the frame and that unnecessary details that do not contribute to the main idea are not included in the scene. Also, a good composition directs the eyes to move to the different parts of the scene in a unified manner. Some basic rules in good visual composition include:
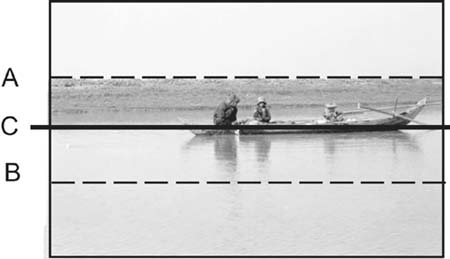
1. The rule of thirds/line of horizon - placing the main subject along the intersections of imaginary lines used to divide a frame into three equal sections vertically and horizontally:

Line of horizon means placing the horizon in a photo of a landscape or sea along A or B and not at the exact center of the frame (C).
For example,
1. Line of sight/line of action. This means leaving extra space in the direction where a person, animal, or object portrayed is about to move or is looking instead of leaving extra space at his/its back. The eyes tend to move towards such direction of movement or sight. Line of sight is especially applied when taking footages of an interview.
2. Eye level. Footages of interviews should b taken at eye level, not at high or low angle.
3. Head room and chin room. There should be enough space above the head (head room) and below the chin (chin room) when taking close-up footages of interviewees.
4. Lessen distractions. Distracting lines and objects in the background should be avoided.
5. Few camera movements. A good video is 70 percent fixed shot. Too many camera movements, like panning (moving the camera lens sideways in viewing surroundings or following a moving subject), tilting (moving the camera lens upwards or downwards), zooming in or out, dollying (moving the whole camera sideways), tracking, and using cranes can be distracting. For each cut, use only one camera movement. For every camera movement, the camera person should put a "pad" at the start and end. A "pad" is a three-second tape recording. Pads provide allowance for wipes and other special effects during editing.
|
|
Sound quality. To make sure that the sound quality of the video footage is good:
1. Use an external unidirectional microphone when taking the footage of an interview or someone talking.
2. If there is no unidirectional microphone, the video footage should not be taken in noisy surroundings.
3. Wearing of earphones while taking the video footage helps the camera person to check the quality of the sound recording.
Lighting quality. To make sure that the video footage has the right amount of brightness and mix of colors:
1. The video camera should not face the main source of light while taking the footage.
2. Check on the LCD monitor to make sure that the subject is not too light or too dark before pressing the "record" button.
3. Using the backlight function of the camcorder often makes the footage too light.
4. Using the night function of the camcorder will make the footage greenish in color.
Taking a steady footage. To make sure that the video footage is steady:
1. Use a tripod (camera stand with three legs).
2. Use the wide angle lens more and less of the telephoto lens.
3. When without a tripod, hold the video camera with both hands.
4. If taking the footage of a long interview or demonstration and there is no tripod, place the video camera on a steady surface like a table.
PRETESTING COMMUNICATION MATERIALS
Communication media managers should exert effort to make sure that scant government funds are properly used when producing communication materials.
Pretesting, which involves checking colleagues' and intended users' reactions to the message concept and communication material, helps correct errors in the material before investing a large sum of money for its reproduction and distribution.
The first level of pretesting involves presenting the message concept and later, the preliminary version of the communication materials to colleagues. This is to check if the message is correct, proper, understandable, and appealing enough.
The second level of pretesting involves presenting the material to the intended users to find out if they understand it well, find it appealing, proper and acceptable.
They are asked if they find the material suited to and addressing them.
Pretesting is important because it ensures that messages and materials suit the intended audience.
It helps the media specialist answer the following questions:
Is the message understood? Is the language appropriate?
Can the material be easily understood?
Are the messages relevant to the intended audience?
Are there too many messages?
Is the source appropriate and believable?
Does the audience like the ad, spot, poster, film or video? Will they tell their friends about it?
Does the ad, spot, poster, film, or video offend anyone? Can it be changed to reduce the offense without losing the message?
Messages should also be pretested with gatekeepers and technical experts.
However, it is the intended audience's opinion about the communication material that is more important.
Trained interviewers, focus group moderators, or extension/field/ research workers with some training conduct pretests.
It involves presenting the communication material to a sample of its intended users and asking them what they understand from it.
They are also asked to give additional comments and suggestions on how clear is its message and how the material can bring about the desired response.
Pretesters of communication materials must avoid the following common pretesting errors:
1. Correcting the respondent and saying, "No, that's not right. This actually means..."
2. Being defensive and holding negative assumptions ("You fool! Can't you see what this is?")
3. Not planning for pretesting (budget, timing, production revisions)
4. Pretesting with people who are not the intended users, for example, with teachers and government employees when the intended users are fishers and farmers
5. Letting the artists or designers do the pretesting, where they may feel that their pride is at stake
6. Asking leading questions ("This is nice, right?")
7. Not asking for further detail/explanation on short, polite responses
8. Explaining the message/material to the respondent ("This is what this means. Do you understand?")
9. Not pretesting with extension workers and technical experts
10. Not using pretest results to revise materials
11. Not pretesting at all
After pretesting the material, the media specialists should revise it according to how they can improve its clarity and effectiveness.
Such revision will be based on the comments and suggestions of pretest respondents. Before reproducing the material, it should be pretested once more. This is to make sure that there are no more elements in it that create users' misunderstanding.
BASIC HANDLING AND CARE OF MEDIA
Operating Media Equipment
Using communication materials effectively includes using media equipment for presentation effectively.
Below are some basic considerations in operating and handling projectors as excerpted from Cadiz (1991; 2003):
1. Voltage. Before even plugging equipment into an electrical outlet, the media user must first check its voltage. Plugging a110-volt equipment in a 220-volt socket would certainly damage it.
On the other hand, plugging 220-volt equipment into a 110-volt socket may not necessarily damage the equipment.
However, it won't work properly because it gets less electric power than what it requires. When there is no electrical outlet that has the same voltage as that required by the equipment, a transformer needs to be used.
To be sure, the media user must check the voltage indicator in the equipment itself. Usually it is placed near the switches and knobs, at the back, or underneath the projector.
Some media equipment have voltage selectors. In such cases, all the user has to do is adjust the selector according to the voltage of the available electrical outlet.
2. Light intensity. When the media user turns on the power switch of the projector, the first thing that happens usually is that it turns on its light source.
Some projectors have adjustments to regulate light intensity. A high intensity allows a clearer, brighter image to be shown.
However, a higher light intensity also heats up the bulb and projector motor faster, lessening bulb lifespan. High lamp intensity is needed when we need to position the projector far from the projection surface or screen to get a large image size.
To make the projected image clear enough, the room may need to be fully darkened especially when the projector has to be very far from the screen.
3. Image size. Image size is adjusted by bringing the projector nearer or farther away from the projection surface or screen.
If a larger image is desired, it is moved away from the screen. If a smaller size is desired, it is moved closer to it.
Some projectors also have zoom lenses that allow making the image larger without adjusting the distance of the projector from the screen.
Often, all that is needed is to rotate the lens to adjust the size of the projection.
4. Focus. The projected image should have sharp (not blurred) edges. This can be adjusted using the focusing knob.
5. Positioning of material. Once a media user has focused a projector, everyone would at once see if the photographic slide, overhead transparency, visual, or motion picture has been positioned properly.
Each type of projector has a specific place where the material to be projected is properly positioned.
Proper positioning of the material on the projector prevents creating disturbances due to images coming out reversed or upside down on the screen.
Sequencing of visuals such as slides must also be correct. Thus, a media user must always preview audiovisuals before they are presented to make sure that they are properly positioned, sequenced and synchronized.
6. Image height. The projected image must be high enough so that everyone can adequately see it.
However, it must not be too high such that viewers have to tilt their heads uncomfortably. To adjust the vertical position of an image, projectors have leveling or elevating feet to elevate their lenses.
Usually, a knob needs to be turned to extend these leveling feet to elevate a projector. If the image height is still too low, a higher projection table may be needed.
Or, thick, flat, stable objects like sturdy books may be used to elevate the front of the projectors.
HANDLING VISUALS DURING PRESENTATIONS
Visuals during presentations can be handled more effectively if users mind the following guidelines suggested by Cadiz (1991; 2003):
1. The user must arrange the visuals in their proper order of presentation before meeting with the learners. This is so that s/he doesn't have to look for a visual and appear disorganized during the presentation.
When using many different visuals, the presenter can lay them out, in an organized fashion, on a table at one side of the front of the room so that s/he can easily pick out the right visual in their correct order of presentation.
2. The presenter must see to it that a poster or large picture to be used for presentation is displayed in a secure and steady position that can be easily seen from various seats in a room. An appropriate stand for such visuals may be needed.
Such a stand may also be built as part of some visuals, like flip charts and flannel graphs. Many times, the chalkboard and its ledge in a classroom or training room provide adequate support for single visuals. Visual materials that keep falling off create unnecessary distraction in the presentation.
3. Visuals must be shown only while they are being discussed. If the presenter has moved on to a new topic, s/he must keep them out of sight so that they do not distract an audience from the speaker's message.
4. Visuals must not be displayed all at the same time. This over-whelms the viewers, who may not be able to follow a discussion in trying to gaze at so many of them simultaneously.
More than one visual may be shown at the same time only when they are being compared or when the discussion calls for it.
5. Presenters of visuals must be careful not to block their audience' view. Moving around helps.
6. When pointing to a specific part of the visual, pointers instead of plain fingers should be used. This keeps the presenter from blocking the audience' view.
For overhead transparencies, the user must point on the transparency on the projector stage using a pencil or other pointed object, rather than pointing to the screen.
Otherwise, his/her shadow will block the projection on the screen.
7. When presenting visual materials, presenters should not lose their eye contact with their audience for prolonged periods. Teachers who use the chalkboard often commit this mistake.
|
|
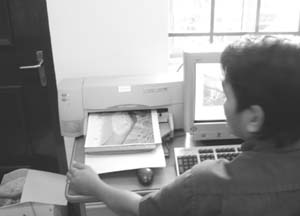
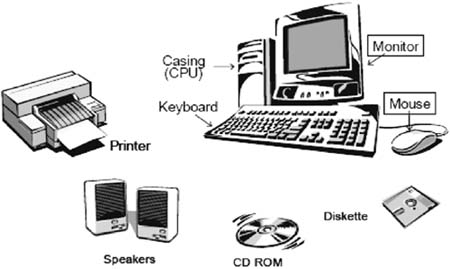
BASIC COMPUTER SET-UP AND MAINTENANCE
Today, it is much easier and faster to prepare communication materials than before because we can now use the computer.
However, this requires familiarity with computers. Remoquillo (2004) shows beginners the basic parts of a computer system that will be useful in producing communication materials in his illustration below:
Like audiovisual equipment, computers will be useful to us if they work properly and last long.
Remoquillo (2003) advises the following procedure for performing disk cleanup, scandisk, and defrag on the computer twice a week:
1. Using the mouse, double-click "My Computer" on the desktop.
2. Right-click on "C".
3. Click Properties (Properties window pops out).
4. Click Disk Cleanup.
5. Check Temporary Internet Files, Recycle Bin, and Temporary OK then Yes.
6. On the Properties window, click Tools.
7. Click Check Now under Error-checking status.
8. A Scandisk window appears. Check Standard and Automatically fix errors, and then click Start.
9. Click Close once Scandisk is finished.
10. Again, on the Properties window, click Defragment Now.
11. Click Yes once defragmentation is finished.
COMPUTER and PERIPHERALS
In taking care of the computer Remoquillo (2003) gives the following reminders:
1. Do not eat in front or near the computer. Food particles attract ants that may enter it and create problems in the computer.
2. Always scan floppy disks that were used in other computers for viruses before opening their files. Also, scan the computer for viruses regularly, preferably twice a week.
3. Shut down the computer immediately when there is power interruption.
4. Back up your files.
5. Avoid putting cellular phones, speakers, and other objects with magnets near floppy disks and the computer.
CONCLUSION
In developing an NRMA message and material, its appeal, approach, content, text and image, context, and source are carefully planned.
The NRMA message and material must command attention, have a clear message, communicate a benefit, be consistent, cater to the heart and mind, create trust, and call to action.
The general steps in developing an NRMA message and material include 1) developing a message concept based on message devices and a pretest of the message concept with colleagues; 2) designing a message for a specific material based on the message concept; 3) pretesting the message concept with the intended users; 4) developing the storyboard; 5) producing the final materials; and 6) distributing the material.
A wide range of possible materials can be used in communicating NRMA with fishers, farmers, and other NRMA stakeholders. They include objects and specimens; printed materials such as leaflets, brochures, handbooks, and newsletters; visuals and audiovisuals such as posters, displays, bulletin boards, audiocassettes, and video; the traditional mass media including radio and television; and alternative community media like audio towers/ public address systems, drama, and other folk media.
The leaflet, poster, and video are among the most commonly used materials in promoting NRMA in developing countries. A leaflet is a single-sheet printed material that explains a simple idea or procedure in the limited space available.
It should be well-written so that it is understandable, containing enough pictures or illustrations to make the ideas clearer.
A poster primarily appeals to the eyes and should have a strong visual impact. Its message must be short and simple enough to be understood at a glance. A video is more complicated and expensive to make than a leaflet and poster, but it generates more interest because of its moving, life-like images and sound.
Pretesting is a necessary procedure in making sure that communication materials in NRMA are understood well by their users. It also helps make sure that scant government funds spent in making them are used well.
The first level of pretesting is getting the reactions and opinions of colleagues on a message concept. This allows them to check whether the message concept is correct, proper, understandable, and appealing.
The next level of pretesting involves presenting the communication material to a sample of its intended users and asking them what they understand from it.
They are also asked to give additional comments and suggestions on how clear is its message and how the material can bring about the desired response.
Beyond knowing how to make good communication materials in NRMA, we should know how to use them properly. Part of using communication materials effectively is being able to operate and handle media equipment properly.
Basic to operating media equipment are knowing their voltage requirement; understanding and manipulating light intensity properly; adjusting image size and height; positioning the material in a projector if applicable; and focusing the projected image.
In handling visual materials during a presentation, it is important to make sure they are seen properly and do not keep falling from their position; facilitators do not block participants' view; they are shown only one at a time as discussed; and the presenter shows them in a well-organized sequence.
Computers have become a necessity in developing communication materials in NRMA. Thus we must also know how to take good care of computers so that they will always function properly and last long. Proper care of computers includes regularly performing disk cleanup, scandisk, and defrag on the computer.
REFERENCES
Cadiz, Maria Celeste H. 1991; 2003 Revised Ed. "Chapter 2: The Educational Communication Media" In Educational Communication for Development. College, Laguna 4031: UPLBCA, p. 23-74.
Castillo, Oliver Carlo T. 2003. "Video Production Basics" (PowerPoint Presentation) College, Laguna, Philippines: Department of Educational Communication, College of Development Communication, University of the Philippines Los Baños
College of Development Communication, University of the Philippines Los Baños PowerPoint Presentations on Message and Materials Development; Print Materials Production; Poster Production; Video Scriptwriting; and Video Production.
UPLB CDC Department of Educational Communication. 2003. "Scriptwriting for Video". PowerPoint presentation for study tour under FAO/TCP/CMB 0165. College, Laguna: College of Development Communication, University of the Philippines Los Baños
Maglalang, Demetrio. 1976. Agricultural Approach to Family Planning. Manila, Philippines: Communication Foundation for Asia
Remoquillo, Bernabe M. 2003. Consultancy Accomplishment Report (May 26-3-, 2003). Phnom Penh, Kingdom of Cambodia: Food and Agriculture Organization of the United Nations Representation in Cambodia.
Sudaprasert, Ma. Rovilla C. "Scriptwriting for Video" A training and course handout. College, Laguna: College of Development Communication, University of the Philippines Los Baños
Velasco, Ma. Theresa H. 2003. "Participatory Materials Development". (PowerPoint Presentation). College, Laguna: College of Development Communication, University of the Philippines Los Baños.
![]()
![]()
![]()