![]()
![]()
![]()
This section describes in detail the procedures and techniques of producing marine snail larvae from the broodstock caught from the wild or the hatchery produced individuals. The procedures and techniques include the natural food production (diatom culture), gamete procurement, larval incubation and settlement, juvenile rearing and basic calculations.
3.1.1 Green Snail
In Tonga, the broodstock introduced from Vanuatu and Japan are kept in rearing tanks and used for spawning when required. In fact, some of the broodstock were the first offspring produced in the hatchery. The size at sexual maturity for the reared broodstock is much lower ranging from 70mm to 96mm SH. The broodstock are reared in a plastic cage with 2.5 cm mesh made to fit inside a concrete raceway tank (3-ton capacity) with running sea water and a strong aeration system for circulating water and supplying oxygen. The cage bottom is elevated 15 cm from the raceway tank bottom to prevent water quality deterioration in the cage. The cage actually keeps the snails away from their waste and silt on the bottom of the tank as seen in Plate 2.
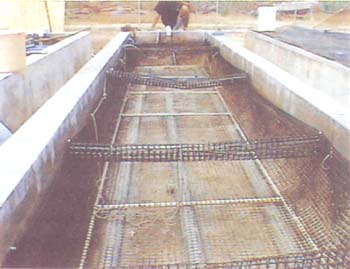
Plate 2. PVC pipes were arranged at the bottom of the raceway tank before the mesh cage was placed on the top.
Red algae, Gracilaria sp. is used as the main feed and should be given in sufficient amounts. (Plate 3). Other red algae such as Eucheuma sp. and Hypnea sp. (Plate 4) are used as sub-feed for the broodstock. About 100 broodstock are placed together in one At raceway tank, with adult shell height reaching 120 mm or more and smaller adults with shell height of about 70 mm.
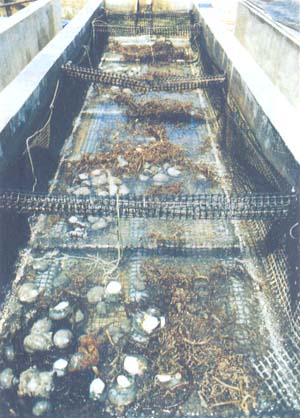
Plate 3. Sufficient feed is placed in the tank for the broodstock. About 100 broodstock are kept in one of these raceway tanks.
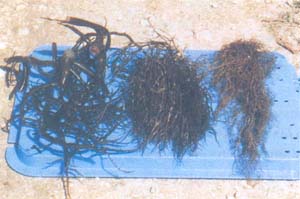
Plate 4. Main red algae used for feeding green snails From left to right, Eucheuma sp., Gracilaria sp., and Hypnea sp,.
3.1.2 Trochus
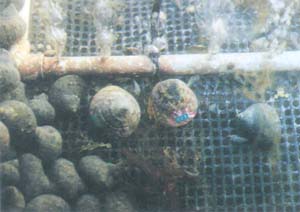
The broodstock collected from the wild on the hatchery produced individuals is reared with giant clam (Tridacna spp.) seed in the concrete tank or in the green snail intermediate tank as seen in Plate 5. A sufficient amount of microscopic attached diatoms should be produced systematically according to the plan of trochus seed production, as in the case of seed production of other gastropods.
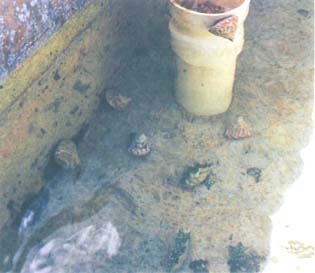
Plate 5. The polyculture of trochus and giant clams.
3.1.3 Abalone
The broodstock (Plate 6) were reared in a plastic cage with 2.5 cm mesh made to fit inside a concrete raceway tank (3 ton capacity) with running sea water and a strong aeration system for circulating water and supplying oxygen. The cage bottom was elevated 15cm from the raceway tank bottom water quality deterioration in the cage. Sufficient amounts of red algae, Gracilaria spp. and Gelidum spp. are used as the main feed which is similar to that used for green snail broodstock. Other brown algae such as Sargassum spp., (still on trial) was used as sub-feed for the broodstock.
The animals were exposed in this method for 2–3 hours. If spawning does not occur, the solution is decanted and the container thoroughly rinsed and replaced with warm seawater. If spawning does occur, proceed to Section 3.3.3, “Releasing and collection of gamete”.
3.3.2.6 Gonadal induction method
The final induction method is application of gonad solution. If spawning is not achieved by any of the other methods, spawned solution from either males or females is used to induce female broodstock to spawn (Capinpin, 1995, and also Singhagraiwan and Doi, 1992). Induced spawning of tropical species H. asinina can be achieved by this method. The gonad of the male is removed, crushed and sieved into a beaker of water. The solution is poured into the broodstock water.
3.3.3 Releasing and Collecting Gametes
NOTE: The methods in this sections are applicable to green snail, trochus, and abalone unless mentioned otherwise.
During the spawning induction trials, male spawners were the first to release their gametes after about 1 to 2 hours in the UV irradiation method shown in Plate 14. Female spawners released their eggs around 15 minutes or more after the first male released its sperm. The first male that releases its sperm was left in the spawning tank to induce the female spawners. If a male releases strong or excessive sperms then it must be removed immediately to a separate male-only tank, to avoid the possibility of polyspermy of the eggs.
Following the release of their gametes, the spawners are immediately placed in their appropriate tanks, that is, male spawners in the male-only tank (Plate 16) and female into the female-only tank (Platel7). Some hatcheries recommend female spawners that have released their eggs be placed individually in a tank of their own. The spawners must be handled with great care at this stage, because reckless or excessive handling can make the spawners stop releasing their gametes.
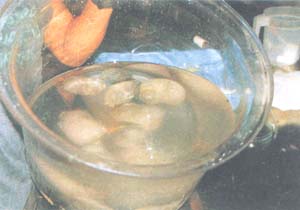
Plate 16. Male spawners are removed from the main spawning tank
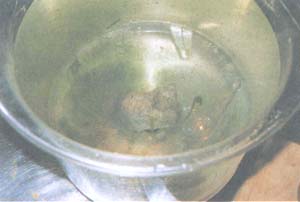
Plate 17. Female spawners are placed in a separate tank.
The time and temperature is recorded when the spawners are placed in the UV irradiate method. During the release of gametes the time for the first male and female spawners is recorded, together with their shell heights. The number of eggs released by female spawners can be calculated from the female-only tank.
Yamaguchi estimated the number of green snail eggs released by a female spawner weighing 2 kg to be around 7 million (Yamaguchi, 1995). It is thought that the number of eggs released by a female spawner depends on its size and maturity.
When spawners were finished releasing their gametes, they were removed from the female-only tank, had their shell height measured, and were placed back into the rearing tanks. The water volume of the female-only tank containing eggs was raised to 20 L and about 200–250 ml of sperm suspension was gently stirred into the eggs in the tank as shown in Plate 18. The egg and sperm suspension was left for 15–30 minutes for fertilization to take place. The time the fertilization process was initiated was recorded.
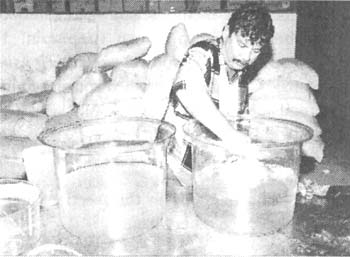
Plate 18.
It is not recommended to use anti-biotics for washing eggs as it may not only give influence to environment but also cause creation of possible resistant bacteria. It is recommended that all equipment and tools to be used for spawning and egg collection be washed by UV irradiated-filtered seawater.
After about 15 to 30 minutes, the fertilised eggs are washed to remove of excess sperm. There were two methods used:
The fertilised eggs were transferred from the fertilization tank into a 7lμm mesh net. Filtered seawater (lμm) was poured into the net to rinse excess sperm (Plate 19). This process was repeated for 5 to 10 times. After washing, fertilised eggs left in the net are transferred gently into a plastic tank containing 20 L filtered seawater. The eggs were allowed to settle.
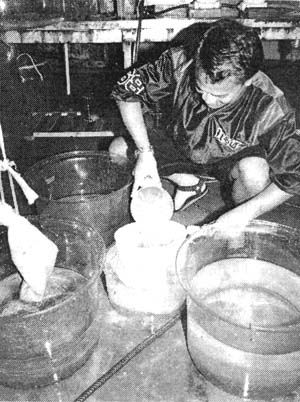
Plate 19.
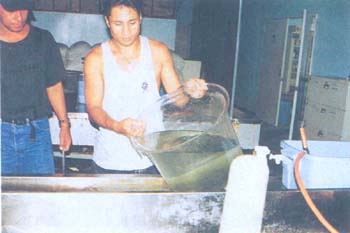
Plate 20.
After the eggs settled, the fertilised eggs were decanted three to remove defective or unfertilised eggs as well as any remaining excess sperms (Plate 20). Good quality eggs are demersal and settle to the bottom of the tank, while defective/poor quality eggs float to the surface.
It is essential to quantify and qualify the eggs produced to determine approximately the fertilization rate, density and diameter of the eggs produced, and the reaction rate and shell height of the spawners using Vernier calipers.
3.6.1 Total egg density (TED)
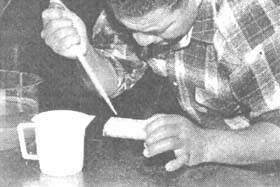
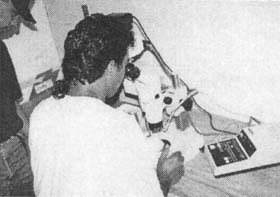
To determine the total egg density, the 20-L tank containing fertilised eggs was gently stirred with a 500-ml beaker in order to disperse the eggs evenly throughout the tank. Ten 1-ml samples were pipetted into a 24-well tissue culture plate (Plate 21) and the number of eggs were counted using a hand-held tally counter under the microscope as seen in Plate 22.
 |  |
| Plae 21. | Plate 22. |
TED = N/10 × 20,000 ml
Where: N = total number of eggs counted
10 = number of 1 ml samples
20,000 ml = volume of the fertilised eggs kept
3.6.2 Egg diameter (ED)
A sample of the fertilized eggs was placed in a watch glass and displayed on the Profile projector using 50X magnification. The diameter of the fertilized egg, which did not undergo mitosis, was measured using a ruler. It is recommended to measure at least ten eggs (Plate 23).
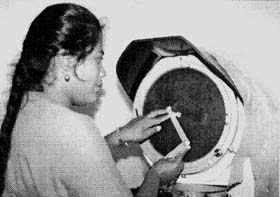
Plate 23.
ED = (N / 10 / 50) × 1,000
Where: N = total egg diameter values Measured
10 = number of eggs measured
50 = magnification used
1,000 = value to convert into a micron unit
3.6.3 Fertilization rate (FR)
The total number of the fertilised eggs undergoing mitosis (four cells to eight cells) stage is counted from the display shown by the Profile projector.
FR = n / N × 100
Where: n = actual number of fertilized eggs
N = total number of eggs counted
100 = value to convert percentage (%)
3.6.4 Reaction rate (RR)
Reaction rate is determined by noting down the total number of broodstock induced to spawn and the number of individuals that spawned.
RR = ns / NB × 100
Where: ns = number of individuals that spawn
NB = total number of broodstock induced
100 = value to convert percentage (%)
After computing all the basic calculations and measurements, the fertilized eggs were transferred from the 20-L tank into the Artemia incubation tank, or the more practical “Saia's” incubation tank.
The Artemia tank is a 100-L or 120-L polycarbonate tank (shown in Plate 24) with a 71μm-mesh screen set above the bottom of the tank. The fertilised eggs that have developed to the trocophore stage (stage before hatching) settle at the bottom of the tank. Filtered seawater (1μm) with an adjusted inflow rate of approximately 0.3 L/min. was pumped into the center of the incubation tank. The seawater flows downward through the 71μm mesh screen and exits from the standpipe.
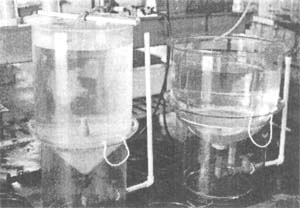
Plate 24 The artermia tank
The “Saia's” incubation tank is a modified form of a larva] incubation tank used in Kagoshima Prefecture Fish Farming Center, Japan (Plate 25). A l00μm mesh net was sewn in a bag shape to fit a 500-L tank and the rim was coated with silicon to seal off any minute holes. It was then fitted into the 500-L tank and filtered seawater (lμm) was added into the tank. A 12 mm diameter rubber hose was fixed on the corner of the mesh net bottom. The temperature of the seawater of the two tanks was recorded. No aeration was supplied during the incubation period.
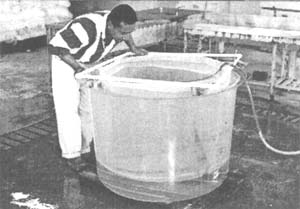
Plate 25. Saia's incubation tank
Between 10 and 15 hours later, the trocophores hatched into veligers (the swimming stage). Warm water temperature reduces the hatching time to about 10 hours, and cooler seawater temperature delays the hatching time to about 15 hours.
Green veligers can be observed swimming in a “tornado” formation at the surface of the water. A strong presence of veligers swimming in this manner indicates good quality larvae. Poor quality (defective and weak) veligers, as well as unfertilised and dead eggs, remained on the bottom of the tank or net. These should be siphoned out 2 to 3 hours after fertilization to reduce the possibility of infection to the rest of the veligers. Growth stages were observed daily under the microscope including the water temperature.
After 3 to 4 days, the veligers had developed into the creeping stage, the pediveliger stage. The swimming larvae settled to the bottom of the tank and were ready to be transferred into the settlement tank, where they started feeding.
At the Sopu Mariculture Center (SMC), the settlement tanks had been prepared two weeks prior to the spawning induction. The creeping larvae were dispersed evenly throughout the settlement tank and were covered with 80% sunshade made up of black sack material to reduce light intensity. The cover could be removed during cloudy or overcast days. Diatoms were used as the first feed for the creepers. Gentle aeration was used with no running seawater added for the pediveligers (Plate 26).
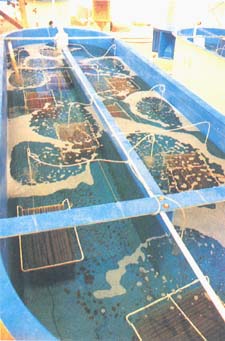
Plate 26
After about two to three days when the pediveligers had settled down, the aeration was increased and filtered seawater (lμm) was pumped into the settlement tank with an adjusted water inflow rate of 5 L/min. The state-of-the-art larval settlement tank at SMC is described in Appendix 2.
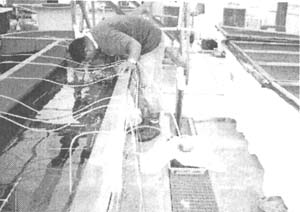
Plate 27
Two months later, the mesh size of the filter bag was changed from a 1 to a 5 or 10μm mesh size. Two months after that, filter bag was changed again to a 25μm-mesh size. The bottom of the settlement tank was cleaned, initially once a month and then more frequently as the juveniles increased in size and feeding capacity. The bottom was siphoned into a 500μm-mesh screen and if any juvenile was siphoned out, it was replaced into the juvenile settlement tank as shown in Plate 27.
3.9.1 Green Snail
Phase I
After 3 to 4 months in the settlement tank, the green snails with a diameter of 2.5 mm or more were collected and transferred to an enclosed cage with a lid and a mesh screen of 1 mm.
These snails were fed with Gracilaria sp. (main feed), and Hypnea sp. (sub feed). The enclosed cage was placed in the raceway tank in Phase III. Filtered water was no longer required, but strong aeration was vital. This was considered to be the first phase of juvenile rearing (Plate 28).
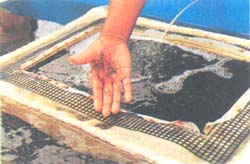
Plate 28.
Phase II
When the shell diameter of the green snails reached 7 mm or more, they were transferred into the raceway tank fitted with a mesh screen of 4 mm (Plate 29). The feed given to the juveniles was Gracilaria sp. as the main feed, Hypnea sp. and Eucheuma sp. as the sub-feed. The cages are cleaned daily as part of the routine work.
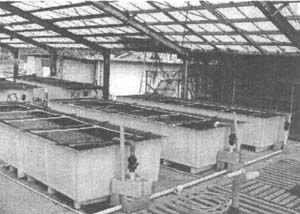
Plate 29.
Phase III
The green snails with a shell diameter of 15 mm or more were transferred from Phase II to Phase III (Plate 30). Fast-growing green snails from Phase II were transferred immediately to Phase III during the daily routine work (Plate 31). The shell height, width and weight of the green snails should be measured monthly.
 |  |
| Plate 30. Green snails kept in Phase III with trochus, Trochus niloticus, and sufficient feed of Gracilaria sp. and Eucheuma sp. | Plate 31. Daily routine work involving cleaning the cages and feeding green snails in Phase III of the intermediate culture. |
3.9.2 Trochus
Normally the juvenile rearing of T. niloticus is either a poly culture, (mix with giant clam juveniles and green snail juveniles), or a monoculture, where the juveniles are place in a tank with micro-algae.
3.9.3 Abalone
Similar juvenile rearing techniques used with the green snail are used with abalone.
Phase I
After six months in the settlement tank, the abalone with a length of 6 to 8 mm or more were collected and transferred to an enclosed cage with a lid and a mesh screen of 1 mm. These abalones were fed with Gracilaria sp. as the main feed, and Gelidium sp. as the sub-feed. The enclosed cage was placed in the raceway tank in Phase III. Filtered water was no longer required but strong aeration was vital. This was regarded as the first phase of juvenile rearing.
Phase II
When the shell length of the abalone reached 20 mm or more, they were transferred to the raceway tank fitted with a 4 mm mesh screen. The feed for the juveniles was Gracilaria sp. as the main feed and Gelidium sp. as the sub-feed. The cages were cleaned daily as part of the routine work.
Phase III
The abalone with shell lengths of 30 to 40 mm or more were transferred from Phase II to Phase III. Fast-growing abalone from Phase II were transferred immediately to Phase III during the daily routine work. The shell length of the abalone is measured monthly. Abalone of this size are released into the wild for stock enhancement or kept as broodstock.
![]()
![]()
![]()