![]()
![]()
![]()
2.1.1 Have a notebook ready for recording the collection data. Record the place and date of collection, who collected the sample and how. Include the depth and the type of substratum whether sandy, coralline or muddy. The method of collection is usually by hand and then dumped in boats or on the beach.
2.1.2 Mounting of a herbarium specimen. Assign a voucher number for each collection. With the help of a botanist who knows Gracilaria, separate the collection into species and assign a number for each species. With the help of a magnifying glass it might be possible to recognize the male and tetrasporic thalli. The female thalli are easy to recognise. Maybe with a simple desk microscope the male thalli which are important in the identification of the species can be separated. The mounting of the specimen can be done temporarily on old newspaper if there is no mounting paper and presser on hand.
2.1.3 Cleaning of the sample is better done in the field when still fresh using seawater because it will be easier to remove attached shells, sand and other algae. If possible separate the other algae from the Gracilaria. Allow enough time for the cleaning because according to experience cleaning the sample at night is not advisable.
2.1.4 Drying of the sample. Spread the seaweed samples on bamboo mats or bamboo tables so that there will be air circulation on top and under the drying seaweeds which will facilitate faster drying. During very sunny days spreading on hot concrete pavement will be alright. Such techniques as practiced by villagers are shown in the following figures (Figs. 4–7). During rainy days the seaweed samples can be dried in an improvized drying oven using coconut or wood charcoal for heating (Fig, 8). It is not wise to keep the sea weed wet when it is already out of its natural habitat because of the presence of hydrolyzing enzymes in the Gracilaria. Dry the seaweed collection as soon as possible to prevent deterioration. Before collecting the Gracilaria whether wild or farmed it is always advisable to have the facilities ready for mounting specimens, sorting, cleaning, drying and weighing of the bulk samples. A triple beam balance will be enough for weighing small amount of samples. Top loading balances will be more convenient where electricity is available. The moisture content of the dry sample should be at least 15 to 20% because very moist samples may deteriorate faster and might produce inferior quality agar. Calculate the dry to wet ratio of the sample.
2.1.5 Bulk dry samples can be transported in gunny sacks to the plant or laboratory (Figs. 9–10). If the samples are quite dry, then plastic bags will do. Small amount of samples can be packed in durable small plastic bags. The samples should be provided with labels or tags showing the following information.
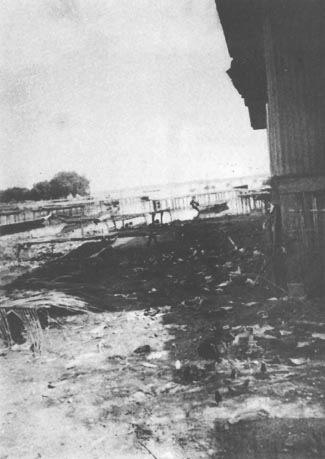 | Fig. 4. Drying on coconut leaves close to the pier where the small boats used for hauling wet seaweed are docked. |
Fig. 5. Drying on bamboo mats with shrimp and fish | 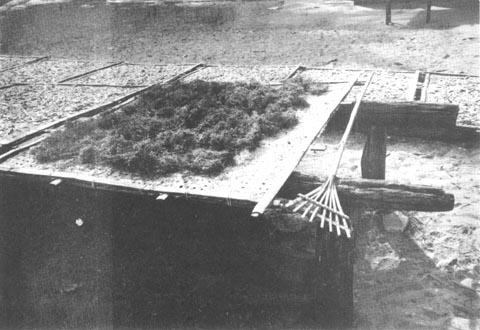 |
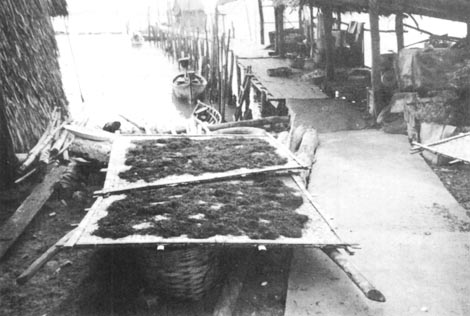
Fig. 6. Drying on bamboo mats close to the dock
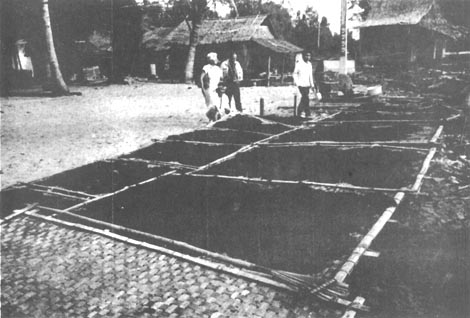
Fig. 7. Drying on bamboo mats close to the homes of the fishermen

Fig. 8. Improvized drying oven
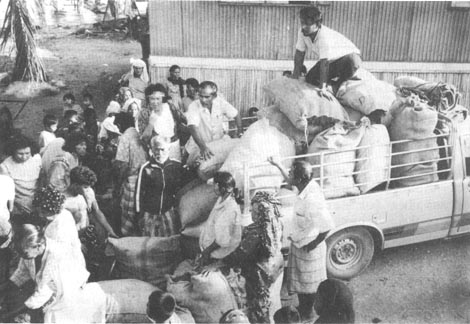
Fig. 9. Transporting of dried seaweeds in gunny sacks
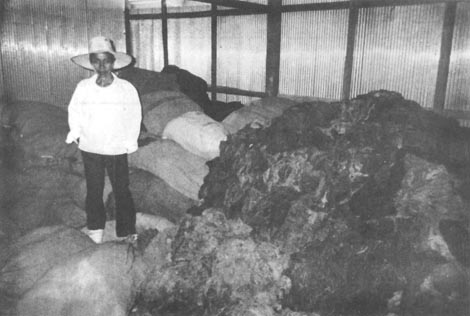
Fig. 10. The dried Gracilaria in the warehouse
| Voucher or sample number | Place of collection |
| Species (if known) | weight |
| Date of collection | Name of collector |
Although the samples have been cleaned and sorted fresh, yet there are still lots of impurities unnoticed or sometimes due to lack of time and facilities in the field samples are immediately dried after collection. So it will be necessary to determine the quality of the dry sample received in the laboratory or in the factory.
Percent of sand, rocks, shells, dry shrimp, small crabs, unwanted seaweeds, etc. Most samples received are just a kilogram or more so weigh out two 100 g samples for determination of impurities. Sort the samples separating the rocks, other seaweeds, shells and other impurities. Put each sample in a tared wire basket. Shake off the sand and fine impurities which could be separated. Collect the sand and other impurities and weigh.

Weigh the wire baskets with the clean seaweed samples and then put them in an oven 100° and heat for 12 hours. Turn the oven off. Weigh the dried sample with the basket.


Weigh two 100 g sample cleaned of impurities. Soak the sample in 2 liters of tap water for 10 minutes. Repeat the soaking 2 more times. Drain the water and squeeze the remaining water off. Put the samples in aluminum pans and dry in a 70° oven for 12 hours. Weigh the samples after drying.

The clean anhydrous weed value is going to be used for the calculation of the agar yield. In the factories large bulk of samples are cleaned and sorted to remove rocks, sand and other algae. The rocks and sand may cause problems during the extraction process. Other seaweeds may produce products other than agar.
The pre-extraction treatment involves bleaching and alkali treatment in the processing of Gracilaria samples,
2.3.1 Bleaching. In tropical countries sun bleaching is very practical. The dry field sample is soaked in tap water or even in seawater if the bleaching is done in the field. The soaked sample is spread on bamboo mats, allowed to dry and then wet again by sprinkling water. The process is repeated until the Gracilaria sample is completely bleached. The bleached seaweed remains brittle and dry.
2.3.2 Bleaching with lime. Make a lime suspension and sprinkle this on the drying seaweed. Lime even helps in increasing the gel strength of the agar. Repeat the sprinkling of lime water on the seaweed sample until bleached.
2.3.3 Alkali treatment. The polysaccharides of Gracilaria have been reported as agaroids because of the high viscosity and low gel strength. To improve the gelling ability of Gracilaria verrucosa agar, Yanagawa (1938) treated the seaweed with aqueous sodium hydroxide solution. Since then the Japanese developed different methods of alkali treatment of Gracilaria for the industrial production of agar and thus making the seaweed one of the most important raw materials for the agar industry in Japan (Tagawa, 1968; Tagawa and Kojima, 1972). According to Guiseley and Renn (1975) Gracilaria became an important source of agar since the 1950s when different methods of alkali treatment to remove the primary sulfate group were developed. The authors claimed that as a result of such treatment Gracilaria agar gels are frequently stronger than Gelidium agars and in general the agarose obtained from such agars contains less sulfate. Shi and Tang (1982) used very strong alkali up to 45% sodium hydroxide, soaking the seaweed in the cold up to 40 days and found that the gel strength of the agar increased 10-fold. Depending upon the Gracilaria species it will be wise to use different concentrations of alkali, in the hot and in the cold with different duration of treatment. In the case of G. limanaeformis from Chile (Kim, 1970), treatment with 3–5% sodium hydroxide aqueous solution at 95° for 60–90 minutes was enough to get an agar gel strength of 910 g/cm2 (1.5% conc.) by the Nikansui Shiki method. The concentration of alkali needed will depend upon how much sulfate is present in the original agar. As discussed earlier, the sulfate groups in some Gracilaria agars are alkali stable and cannot be removed by such treatment.
In a 5-gallon plastic tank which is provided with a drainage valve, put 14 liters of 20% sodium hydroxide solution. Put one kilo of dry sample into the sodium hydroxide solution and allow the seaweed to soak for 3 days. Drain the caustic alkali solution into another tank (this can be used for another 1 kilo batch of sample by just making up the volume to 14 liters by adding more 20% NaOH). Wash the treated seaweed with tap water until it is almost free of alkali. The first washing could be of future use. Dry the treated seaweed by spreading the sample on concrete or on bamboo mats under the sun. After drying calculate the percent yield of alkali-treated seaweed. In Taiwan such alkali-treated seaweed is being exported to Japan.
2.4.1 Weigh two 50-g samples from each of the resulting samples in the pre-extraction treatment process (such as 2.3.1, 2.3.2 and 2.3.3). Get six 2-1 capacity beakers and pour into each beaker 1 000 ml of water. Put each sample into each beaker and add enough acetic acid with stirring to pH 5.6-6.0. After soaking the seaweed samples in the acidic water for 30 minutes, drain the water and then add 1 000 ml of fresh water to each beaker. Better use stainless steel instead of glass beakers for the extraction of the agar for safety measures. Heat the samples on a water bath at 95° for one hour. While heating the seaweed samples, have some hot water ready in a wash bottle. All the six samples should be treated as follows: Transfer the hot seaweed to a blender. After blending return the gooey extract to the pot, wash the blender with hot water and combine the washing with the rest of the extract. Heat the extract for 3 hours, stir in 75 g filter aid for 30 minutes. Simultaneously heat the pressure filter (filter bomb, Fig. 11). Pour the extract into the pressure filter, add ca. 100 ml of hot water into the pot, scrape the sides of the pot with a rubber spatula and combine this washing with the rest of the extract to be filtered. Close the pressure filter and connect it to an air compressor and filter under 50–80 psi pressure. Wash the filter cake with 200 ml hot water and mix the washing with the rest of the filtrate and pour this into 2 – 9" × 13" aluminum pans. Allow the agar sol to gel at room temperature. Cut the gel into small squares with a thin blade spatula and put the pan in the freezer. Remove the pan from the freezer the next day and allow the gel to thaw. The thawed gel is transferred to a strainer which is lined with a very fine polyester piece of cloth. Drain the thawed water, wash the gel with tap water until almost colorless, wash with distilled water, squeezing the gel to remove washing and then finally with isopropanol to facilitate drying. Squeeze the isopropanol off. Shred the flaky agar, put in a tared aluminum pan or tray and dry at 55–60°C. Weigh the agar after drying and grind to a 40-mesh powder in a Wiley intermediate mill. Calculate the clean anhydrous yield by finding out how much of the 50 g treated sample is equivalent to the clean anhydrous weed.

2.4.2 Treatment of agar yield from (2.3.1 & 2.3.2) samples. Weigh l0 g of each of the powdered agar. Prepare 200 ml batches of 20% NaOH in 2 plastic beakers (glass beakers will be etched by the very strong alkali). Suspend the powdered agar in the strong alkali for 3 days at room temperature stirring the suspension every now and then. Drain the alkali by straining the agar through fine cloth. Wash the agar until free of alkali and then treat with 0,1% hydrocholoric acid to neutralize the residual alkali. Wash the iso-propanol and squeeze off the alcohol. Shred the agar flakes and dry in a 55–60°C oven. Weigh and calculate the percent yield.
A prototype agar extraction set-up is shown in Fig. 12.
 |  |
 |  |
Fig. 11. Pressure filter
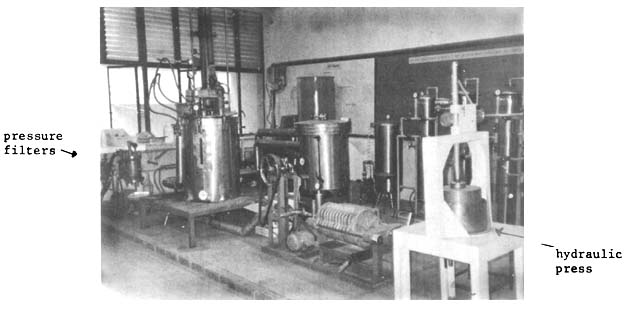
Fig. 12. Prototype agar extraction set-up (capacity - 200 liters)
Agarose has been fractionated from the charged polysaccharides of agar by the acetylation method of Araki (1937) and by the Sephadex chromatography of Duckworth and Yaphe (1971). Allan, et al (1971) used chitosan Sviridov, et al (1971) rivanol, Fuse and Goto (1971) acrinol, Hjerten (1962) cetylpyridinium chloride, Barteling (1969) ammonium hydroxide and Egorov, et al (1970 ammonium sulfate for the precipitation of agaropectin. Russel, et al (1964) devised a method of precipitating agarose with polyethylene glycol.
Blend a 12 g agar sample with 2.4 g k-carrageenan and 50 g filter aid. Add the mixture to 800 ml water with stirring and boil for 5 minutes to dissolve the agar and carrageenan completely. Then add 200 ml of 5% benzothonium chloride rapidly, dropwise along the sides of the beaker, a bulky curd-like precipitate forms immediately. Filter the mixture while hot under low pressure (10–20 psi) using 2 layers of Whatman No. 5 filter paper laid on top of the filter felt. Rinse the filter cake with hot water (100–200 ml), pour the combined filtrate and washings into a 9" × 13" rectangular aluminum pan, allow the agarose solution to gel at room temperature, cut the gel into cubes with a spatula and then freeze overnight. Thaw the agarose gel the next day, wash with tap water, then with distilled water until almost colorless and finally twice with 85% isopropanol. Shred the agarose mass, dry at 55–60°C and powder to 40 mesh in an intermediate Wiley mill. Calculate the yield.
Weigh 100 g of the dried Gracilaria sample, put this in a 2-1 stainless steel beaker, heat at 85-90°C for 1 hour with a solution of 30 g NaOH in 1 000 ml water. After heating, drain the alkaline solution and wash the seaweed 3 times with tap water until free of alkali. Soak the seaweed in 1 liter of 0.01% hydrochloric acid for 10 minutes then wash 3 times with water. Heat the sample with 700 ml water on a boiling water bath for 1 hour, blend, return the paste and washing into the pot and heat further for 3 hours at 95°C. Stir 75 g filter aid into the sample for 30 minutes and then filter hot under 50–80 psi pressure. Combine the filtrate and washings and return this to a clean 2-1 stainless steel pot or beaker, heat the extract in a water bath, stir with 2.4 g k-carrageenan and 50 g filter aid. After 5 minute heating, add 200 ml 5% benzothonium chloride solution, allowing it to flow along the sides of the pot, boil for 3 minutes, filter hot under 10-20 psi pressure in a preheated pressure filter through two layers of Whatman No. 5 filter paper. Wash the filter cake with 200 ml hot water. Combine the filtrate and washings and pour this into a 9" × 13" rectangular shallow pan. Allow the agarose sol to gel at room temperature, cut the gel into cubes with a narrow blade spatula and freeze overnight. Thaw the frozen gel the next day and transfer the thawed gel into a strainer lined with a very fine polyester cloth. Squeeze the thaw water off, wash the gel with tap water until colorless, next with distilled water, then with 60% and then 85% isopropanol. Squeeze the agarose to remove the washing liquid as much as possible. Shred the agarose flakes and dry at 55-60°C. Weigh the dry agarose and calculate the yield.
Use the same method as in 2.5.2. above except that 5 g of powdered Eucheuma striatum is added to the Gracilaria paster, heat for 3 hours, add the filter aid, stir for 30 minutes and filter hot.
Weigh 2.7 g of powdered agar on a tared weighing paper. Pour about 100 ml hot water into a tared electrolytic beaker and put the weighed sample into it. Allow the agar to soak. Break the lumps with a narrow spatula and be sure to wash the spatula well with hot water and allowing the washing to drip into the beaker with the sample. Heat the beaker with the sample using a beaker holder and clamp on a water bath at 95°C with continuous stirring. A mechanical stirrer with a short paddle to fit into the bottom of the beaker is necessary for this purpose. Stir until the agar is dissolved. It will be necessary to replenish the water lost due to evaporation every now and then. Wash the stirrer with hot water allowing the washing to drip into the beaker. Weigh the beaker and sample on a top loading balance and add enough hot water from a wash bottle to make the weight of the agar solution to 180 g. Return the beaker with the agar solution into the water bath and stir for about a minute to mix the agar and water well. Pour the hot agar sol into a crystallizing dish (50 × 70 mm) up to the rim. Allow the agar to gel at 20°C and keep in a circulating water bath for 2 hours for the FMC gel tester (Fig. 13). and 24 hours using the Nikansui gel tester (Fig. 14). Cover the dish to prevent loss of water from the gel. Before determining the gel strength invert the gel so that the bottom surface is on top. This can be done by allowing the thin blade of a stainless steel spatula (20 cm long with the flat blade about 5 cm long) slide between the gel and the side of the dish and holding the dish in an inverted position until there is an air space between the dish and the gel so the gel will just slide and come off from the container. Put the gel back into the dish so that the bottom surface is on top. Then measure the gel strength. It has been observed that the top surface has always a stronger break force than the bottom surface. Determine the gel strength by FMC Gel Tester or by the Nikansui method.
 | An automatic, versatile gel testing instrument. Measures the “break force” required to rupture both milk and water gels, thereby determining the gel strength. May also be used for measuring curd tension of dairy products and strength of certain foams. |
| Fig. 13. Gel tester |
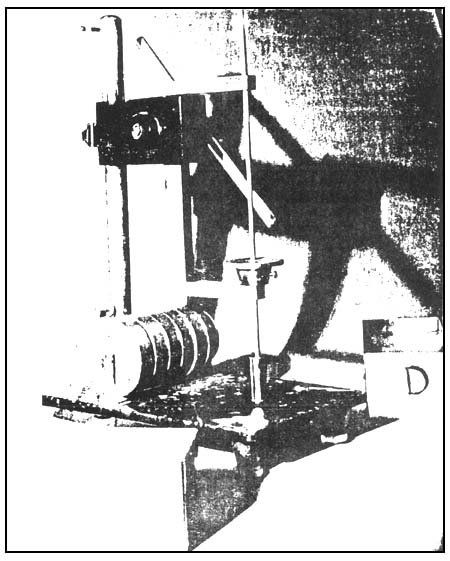
Fig. 14. Gel strength measurement. Nikansui method.
Gel strength determination by the Rowerbal method (Meer, 1980) (Fig, 15). Weigh out 3.00 g agar analytically. Add the water (hand stirring using a glass rod) and disperse the agar uniformly. Heat the beaker rapidly on an asbestos wire gauze with a gas flame with constant stirring until the agar solution boils. Heating should be regulated to 10 minutes total time. After boiling starts, make the flame smaller and boil 1 minute. Remove the beaker from the flame and break the foam by stirring and swirling for a few minutes. Make sure that the weight of the hot solution is at least 220 g immediately after boiling by adding water if necessary. Allow it to stand at room temperature for 2 hours away from air current. Keep the beaker with the gel in a 25°C water bath for 22 hours. The gel should weigh at least 195–205 g. Record the weight of the gel. Separate the gel that adheres to the side of the beaker by sliding a thin blade narrow spatula. Place the beaker containing the gel on the right pan of a two-pan balance. Balance the beaker and gel weight with a 1-liter beaker and conventional weights. Press down the right pan and lower the plunger (diameter, 1.13 cm; cross-sectional area 1 cm2 ) against the top gel surface at a position approximately 10–14 mm from the outer edge of the gel and at the same time keep the beaker centered on the balance pan. Allow the water to run into the beaker from a graduated 1 000 ml separatory funnel at a rate of approximately 200 ml/minute. The flow rate should be adjusted with the stopcock fully open. Close the stopcock when the gel breaks. Record the amount of water used. Pour the water back in the funnel. Repeat the last six steps until there are four holes, placed symmetrically about a circle in the order of 0°C, 180°C, 90°C and 360°C. Get the average of the readings and calculate the gel strength according to the following formula:

| where G | = gel strength in grams per square centimeter |
| W | = millimeters of water necessary to break the gel |
| X | = weight of gel in grams (to ± 0.lg) after 24 hours |
Dissolve 750 mg of agar in 50 ml water with stirring for 5 min in a 957deg;C water bath. Pour enough of the agar sol into 18 × 150 mm test tubes just enough to reach the immersion line of the thermometer placed inside the tube. Put the tubes in a rack (about 7 can be accommodated at a time) in a 60°C water bath. When the temperature of the tubes is the same as the bath, pass cold water through a copper coil in the bath. When the temperature in the tubes reaches 50°C, adjust the flow rate of the cold water so that the temperature drops about 0.3–0.5 per minute. Carefully withdraw the thermometers from the tubes. Gelation occurs when a neat hole remains and the agar sol does not flow back to form a normal miniscus. Record the gelling temperature to the nearest 0.5°C.
Prepare 1.5% agar sol as above (2.6.2) and pour 5 ml of the sol into 18 × 150 mm test tubes and allow the sol to gel for one hour at 20°C. Put the tubes in a rack in a 60°C water bath. On the surface of each gel sample drop a lead shot (diameter ca. 1 mm, 25 mg). Gradually raise the temperature of the bath at 1°C per minute. When the gel melts the lead shots drop to the bottom of the tube. Record this as the melting temperature. Sometimes it is necessary to break the surface of the gel when dropping the lead shot.
Determine the moisture content of the agar by weighing 100 mg samples and drying in vacuum dessicator at 70°C for 12 hours. Determine the sulfate by the normal gravimetric method. Weigh 0.5 g samples to the nearest mgm into 125 ml flasks. Add 10 ml conc. nitric adid to each sample. Insert the air condenser and boil (123°C). Do not allow the sample to dry up. Add more acid to insure complete oxidation which takes about 30 minutes. The final volume of digest is about 2–3 ml. Cool the sample and add 2–3 drops of 40% formaldehyde solution through the air condenser to reduce the excess HNO3 . There will be evolution of N2O4 (brown gas) with a rise in temperature (the reaction should be performed in a fume hood). The reaction is complete when further addition of HCHO does not produce any brown gas. After completion of the reduction, wash the air condenser with distilled water allowing the water to flow into the flask. Filter the reaction mixture into a 400 ml beaker.
 | 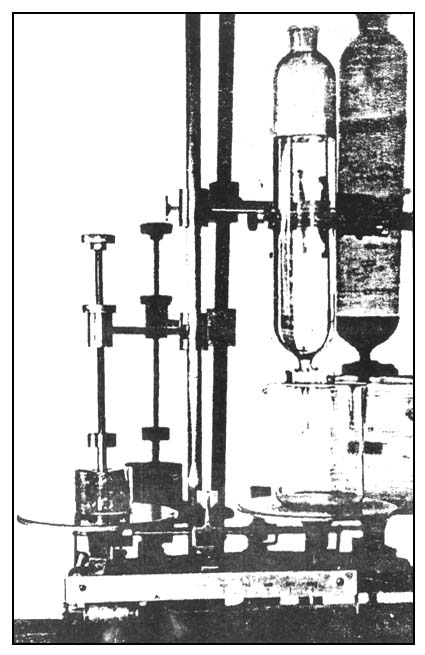 |
Fig. 15. Rowerbal method
Add 0.5 ml conc. hydrochloric acid to the filtrate. Add distilled water to bring the volume to 200 ml, heat to boiling and add 10 ml M/4 BaCl2 solution dropwise with constant stirring (hot plate-stirrer is advised). Continue boiling for 5 minutes and then set aside in a warm place for 5 hours.
Ignite 30 ml fine porosity (filtering) crucibles for 30 minutes at 700°C in a muffle furnace. Cool in a desiccator for 15 minutes and weigh. Filter the BaSO4 precipitate through the tared crucibles with suction. Wash the precipitate off from the beaker with hot water from a wash bottle using a rubber policeman to scrape off the precipitate from the sides of the beaker. Wash the precipitate five times with hot water or until the precipitate is free of chlorides.
Wash the outer surface of the crucibles with hot water before drying them in an oven. Transfer the crucible with the BaSO4 to a muffle furnace preheated to 700°C and ignite the BaSO4 for 1 hour or until the weight is constant. Remove the crucibles from the muffle and transfer to a desiccator to cool. Weigh the crucibles with the BaSO4 . Calculate the weight of the BaSO4. Calculate the % sulfate in the samples.

The sulfate and methoxyl content of agarose can also be determined by ion-exchange chromatography. Another method of determining the sulfate is by the Jones and Letham method (1954). For the determination of sulfate in agarose by the gravimetric method 2 g samples are used. The ash content can be determined by igniting the sample at 550°C to constant weight. Agar clarity can be determined by measuring the transmittance of 1% agar gel at 500 nm wavelength using distilled water as standard.
![]()
![]()
![]()