Material. 5-mm carbon-steel plate (old plough or harrow disc is ideal).
Additional tools. Bolster for eye; bursting punch; drift; fuller 12-14 mm; bottom swage about 25 mm; set hammer.
METHOD
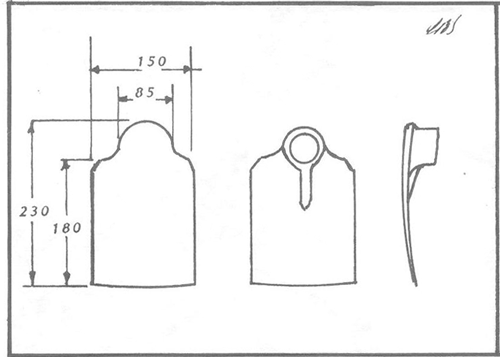
From carbon-steel plate cut either the pattern shown in Fig. 144 or one of your choice. Cutting can be done by heating and using a sharp hot set. After cutting, edges can be heated and hammered to improve the finish or, if a grinding machine is available, the edges can be ground before proceeding with the work.
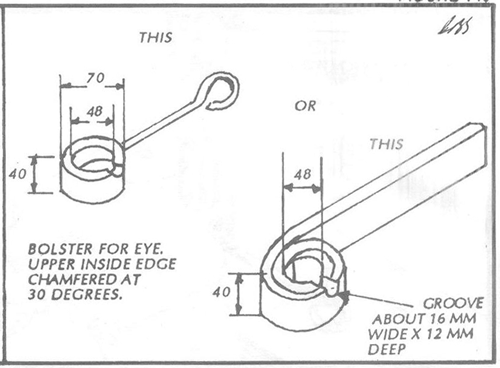
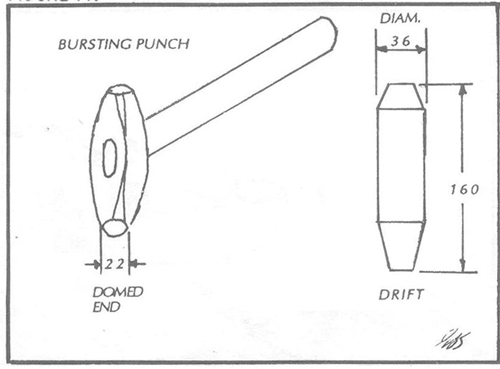
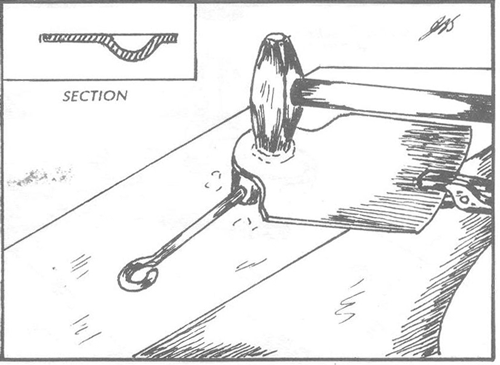
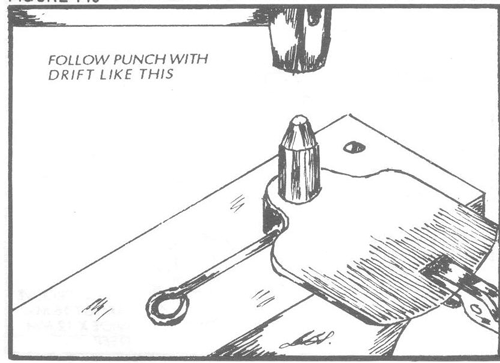
Position the eye bolster (Fig. 145) over the tool hole of the anvil and have the bursting punch and drift (Fig. 146) at hand. Heat the upper part of the blade to a bright red heat, position as in Fig. 147 and begin punching. Relatively thin steel cools quickly and two or three heats may be necessary to enable the punch to be driven well into the work. If the metal is allowed to cool too much during punching, cracking will occur. A few quick blows followed by reheating are most effective. The punch should penetrate to 25 or 30 mm. The work is again reheated to a bright red heat and the drift is hammered into the depression and through the workpiece (Fig. 148). Again, take care not to allow the work to cool too much. Reheat as necessary. A small plug will be cut out by the drift, leaving an eye or socket with 4 mm or so of a flange around the eye for additional strength. Any trueing up of the eye or socket can be done around the beak of the anvil.
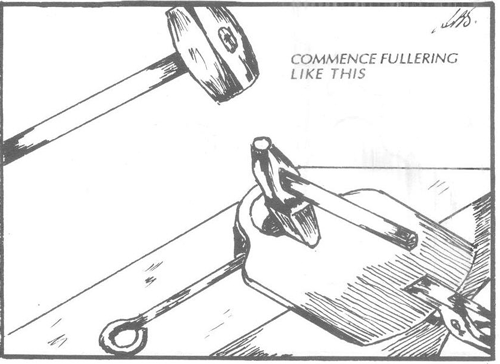
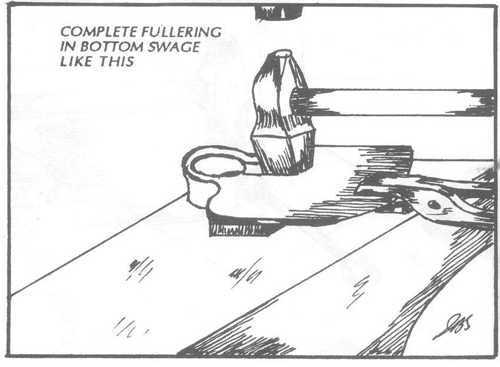
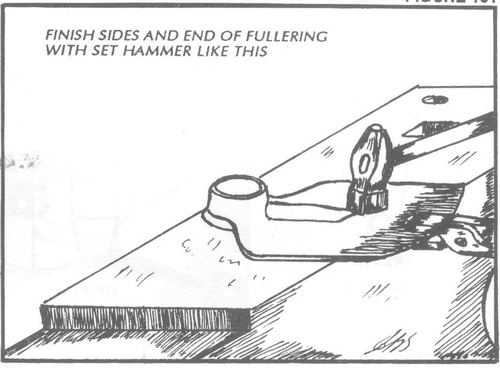
The work is again reheated to a bright red heat and fullering is started (Fig. 149). In fullering into the groove in the bolster, ensure that this fullering is on the centre line of the blade. Fullering is completed in a bottom swage (Fig. 150).
The eye is again reheated and its shape corrected around the beak. During this operation the remains of the flange around the eye can be stretched slightly to give the eye some taper to help retain the shaft when fitted.
Finally, adjust the angle of the blade to the eye to suit the user and finish as in Job 20.
