G.P. Martelli, V. Savino and B. Walter
The object of indexing is to detect the presence of viruses or virus-like agents in grapevine accessions or selections whose sanitary status is to be assessed.
The use of Vitis indicators is compulsory for virus-like and latent diseases, since it represents the only possible way known to date for ascertaining the occurrence of infections. Identification is based on the differential reactions of the indicators.
Indexing programmes, regardless of whether they are carried out on a small or large scale, i.e. for experimental or commercial purposes, require adequate facilities in terms of greenhouses, sheds and land. Availability of nursery land is especially important for growing mother indicator vines (producers of cane wood for indexing) and indicators that have been graftinoculated. These, irrespective of the inoculation procedure used, except for green grafting, must be grown in the field for no less than two to three seasons to allow a clear expression of symptoms.
INDICATORS
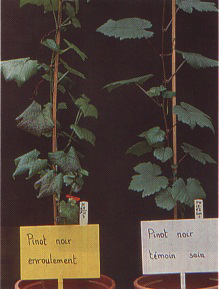
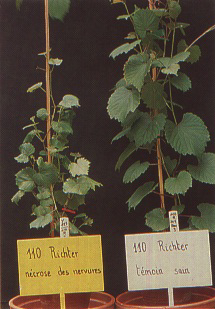
The main indicator plants used for grapevine indexing are listed in Table 6. All indicators are liable to be infected by the whole range of grafttransmissible disease agents, but the symptoms they express may be specific enough for a reliable diagnosis of given diseases, e.g. 110 R for vein necrosis, Vitis rupestris for rupestris stem pitting, fleck and asteroid mosaic, red-berried Vitis vinifera cultivars for leafroll, LN 33 for corky bark, enations and LN 33 stem grooving and Kober 5BB for Kober stem grooving.
Indicators for European nepoviruses other then GFLV, American nepoviruses and other minor diseases may differ from those in Table 6. These indicators, when known are mentioned in the descriptions of individual diseases.
For a fairly complete routine indexing, the use of the first seven indicators in Table 6 is advisable. Since at least three individuals of each indicator should be inoculated, each candidate vine under indexing requires a total of 21 grafts.
ESTABLISHMENT AND CARE OF MOTHER VINE INDICATORS
Mother vine indicator plantings constitute the source of cane wood for indexing. Errors in the establishment and care of these plantings may jeopardize indexing programmes.
Mother vine plots should meet as many of the following criteria as possible:
be located on grounds reasonably close to the research unit in
charge of indexing;
be established on good quality, well-drained and clean soil,
preferably with no grapevine history or at least tree of
grapevines for at least IS years;
be separated by at least 20 m from other vineyards to minimize
contaminations from adjacent plots by irrigation water, flooding
and cultivation;
be large enough to accommodate other optional indicators in
addition to those used routinely.
Before planting, the land must be carefully surveyed for the
presence of nematodes, paying attention to virus vector species.
Soils infested with virus vectors, especially Xiphinema index,
are unsuitable for growing indicator vines even
after nematicide treatment. Chemical control with any suitable
nematicide product is recommended before planting and before each
replanting.
TABLE 6 Main indicators for virus and virus-like diseases of the grapevine
| Indicator | Disease identified |
| Vitis rupestris St George | Fanleaf fleck,
asteroid mosaic, rupestris stem pitting |
| Vitis vinifera
Cabernet franc, Pinot noir and other red-berried cultivars |
Leafroll |
| Kober 5BB ( Vitis berlandieri x Vitis riparia) | Kober stem grooving |
| LN 33 (Coudero 1613 x Vitis berlandieri) | Corky bark, enations, LN 33 stem grooving |
| Baco 22A | Stunting component of leafroll |
| Vitis riparia Gloire de Montpellier | Vein mosaic |
| 110 R ( Vitis rupestris x Vitis berlandieri) | Vein necrosis |
| Vitis vinifera
Mataro or Mission seedling 1 |
Leafroll yellow speckle |
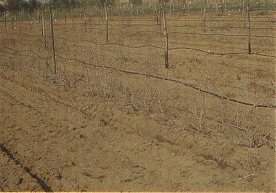
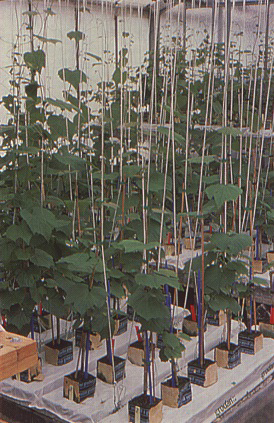
The land should be prepared for good culture and the vine stand arranged for simple maintenance and irrigation, preferably drip irrigation. Although mother vines can be trained according to local systems, bilateral horizontal cordons seem quite suitable (Figures 185 and 186).
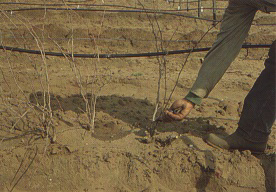
Special attention is to be paid to phylloxera, as it not only can endanger self-rooted V. vinifera indicators but can cause much damage to leaves and shoots of indicators of American Vitis species (Figure 187). Early removal of spring leaves that bear the first galls slows down further reproduction of phylloxera, thus keeping the population low. Spraying schedules for chemical control of phylloxera and possible airborne vectors (pseudococcid mealybugs and leaf hoppers) should be devised according to necessity and local conditions.
COLLECTION AND STORAGE OF WOOD FOR INDEXING
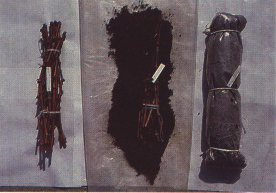
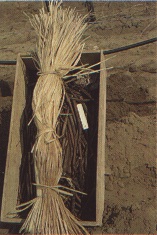
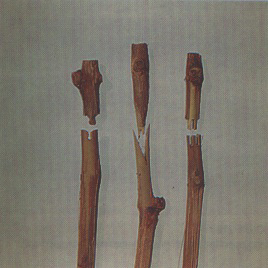
Mature canes of the current season are collected from indicator mother vines in autumn or early winter. The canes are selected according to size; those with a diameter smaller than 0.8 to 1 cm or larger than 2 to 2.5 cm are discarded. The selected canes are cut into 40- to 50-cm long pieces bearing four to six nodes. Cuttings are bundled in groups of 20 to 30 and labelled (plastic tags marked with a pencil or felt pen are quite suitable). Individual bundles are wrapped in cloth or moist paper and then in a polythene bag, or are placed in slightly moist peat moss and wrapped in a polythene sheet (Figure 188). The bundles are labelled and stored at 2 to 4°C. Although not strictly necessary, dipping cuttings before packing in 1 percent aqueous suspension of Captan or other suitable fungicide may prove useful to prevent moulding. Coldstored cuttings keep for up to three years and may be withdrawn at any time for use.
Cane wood of donor vines to be indexed its collected, treated and stored in the same way. Well preserved coldstored canes can be used throughout the year for ELISA testing for nepoviruses and closteroviruses .
PREPARATION OF INDICATOR WOOD FOR INDEXING
Canes of the indicators are withdrawn from cold storage and washed clean prior to being cut into smaller pieces of a size suitable to the type of graft inoculation used. Indicator wood can be used within a few hours of withdrawal from cold storage. No special precautions are required for its handling.
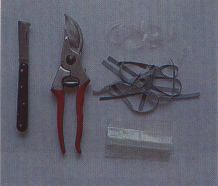
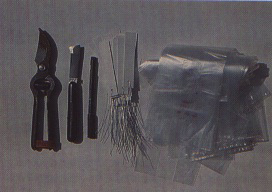
GRAFTING TOOLS AND MATERIALS
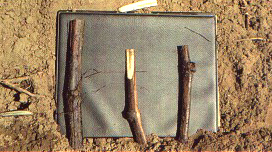
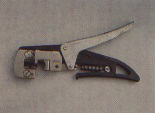
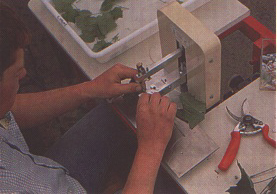
Grafting tools may be those used locally, provided that they are of good quality and are kept clean and sharp. The major tools and materials are (Figure 189):
GRAFT INOCULATION METHODS
Several grafting methods can be used for indexing, their choice being dictated by available facilities and expertise and by the extent of the indexing programme. Each procedure has its own advantages and drawbacks but all, once mastered. guarantee high graft takes, a step of utmost importance for successful indexing.
Field (cleft) grafting
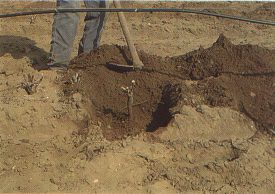
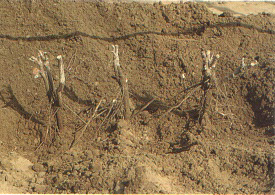
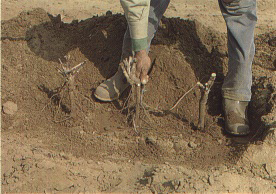
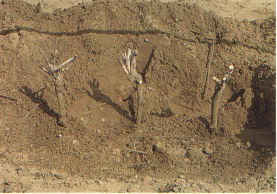
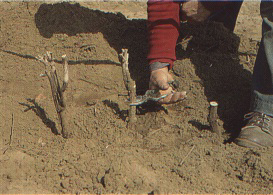
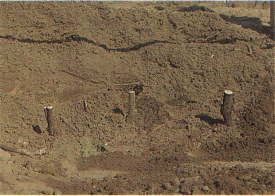
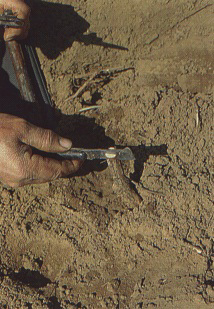
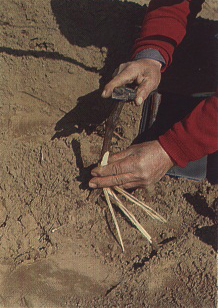
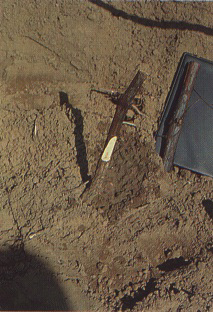
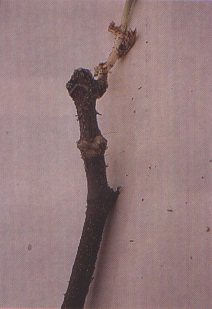
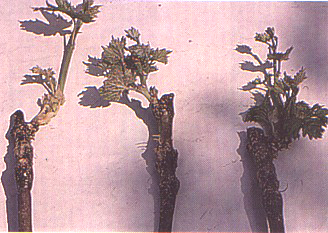
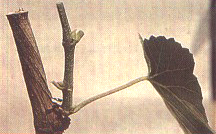
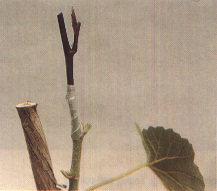
Rooted or unrooted cuttings of the candidate vine are planted in the nursery at close spacing (about 30 cm apart) in groups of three in a row and are allowed to grow undisturbed for a whole season. The following winter (Figures 190 and 191) the young vines are pruned (Figures 192 and 193), the soil around them is removed (Figures 194 and 195) and the roots from the crown are cut away (Figures 196 and 197). The vines are then cut back so as to leave a stump with a smooth surface (Figures 198 and 199). The canes of the indicator to be used as scions are cut into one-bud pieces 10 to 15 cm long, which are placed in boxes and kept moist (Figure 200). Bud sticks of the scion with an extremity cut in a wedge shape (Figure 201) are inserted in a 2- to 3-cm-deep cleft made in the stumps with a budding knife (Figures 202 to 204). The graft is then tied with raffia (Figures 205 and 206) and covered with moist, well pulverized soil (Figures 207 and 208). The graft will callous through the winter but will remain dormant until the next spring (Figure 209). With many diseases, symptoms will appear in the first flush of vegetation (Figure 210)7 four to six weeks after bud burst.
A distinct advantage of field grafting is that there is no transplanting crisis, which minimizes losses of grafted indicators. However, the procedure is slow and quite expensive and requires fairly large land surfaces and skilled operators.
Chip-bud grafting
Canes of indicator vines are withdrawn from cold storage just before use and are cut into cuttings of two to three nodes. The cuttings are planted with the basal part about 6 cm deep in moist sand, directly on a bench heated at 25 to 27°C or in trays placed on the heated bench (Figure 211). When rooted (Figure 212), the cuttings are potted in clay or plastic containers and kept in a greenhouse at 22 to 24°C for a couple of weeks before grafting. During this period rooted cuttings do not require special care if the environment is clean and the potting mixture was properly sterilized before use.
Wood of candidate vines to be indexed is removed from storage the day before its use and held at room temperature (20 to 22°C). For grafting, a bud (or a chip of wood from the internode) is removed from the cane of the donor vine by making a cut above the bud, then a cut at an angle just below the bud, letting the knife travel smoothly upward through the wood until it reaches the first cut. A notch of a size compatible with that of the chip taken from the candidate vine is made on the indicator just below the top shoot. The chip is placed in the notch, tied with budding rubber and wrapped with plastic tape or plastic film (Figure 213).
Grafted cuttings can be held in a greenhouse for symptom development or placed in a shed for a hardening-off period of two to three weeks. Before they are transferred to the field the wrapping tape is removed and the inoculum checked. Unsuccessful grafts are replaced by rebudding below the first graft. When transplanting out of doors, ensure that the whole set of indicators for each candidate is planted along the same row, with a spacing of about 30 cm between roofings.
Chip-bud grafting is a very handy method; it is simple and easy to perform, does not require special skill and ordinarily gives excellent results, provided that the indicators are properly handled, especially during transplanting and hardening-off.
Machine (bench) grafting
Several types of mechanical grafting equipment are available, from the very simple hand- and foot-operated (Figures 214 to 218) to the more sophisticated and costly heavy-duty and electricity-powered machines (Figures 219 to 221).
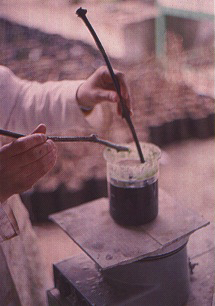
Examples of machine-made grafts are illustrated in Figures 222 and 223. In the former a chip with a bud excised from a donor vine is fitted into a compatible notch carved in the indicator cutting and tied; in the latter a onebud, 5- to 6-cm-long scion (usually the indicator) and a 30- to 40-cm-long disbudded cane of the candidate vine used as understock are joined by an omega, V-shaped or saw-type cut. Immediately after grafting the graft union can be waxed for protection, although this is not strictly necessary. This is done by quick-dipping the grafted cane tip into a melted grafting wax (Figures 224 and 225) or, more simply, into melted, low melting point (54 to 56°C) paraffin.
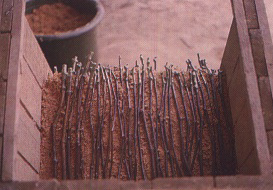
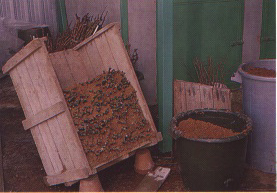
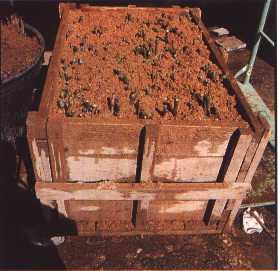
Grafted dormant cuttings are stratified in a box with moist sawdust or peat moss (Figures 226 to 228) and placed in a hot room at about 30°C for callousing. When callousing is completed all around the graft union (usually within four to five weeks) (Figure 229), the boxes are placed in a cooler, well-lit room or in an open shed for three to four additional weeks for hardening-off of grafted roofings (Figure 230) before transplanting in the field.
Machine grafting is quick and is thus especially suitable for large-scale indexing. However, several steps of the procedure, such as callousing and transplanting, are critical and may cause substantial losses of grafted roofings. Additional losses because of low graft take are to be expected because of the nature of the material processed, which may be weakened by infection or may contain pathogens that interfere with graft union. Even under the best conditions not more than 70 percent of grafts are successful, and this percentage may drop dramatically with less compatible scion/stock combinations.
Green grafting
In principle, green grafting is a simple technique, suitable for both small- and largescale greenhouse indexing.
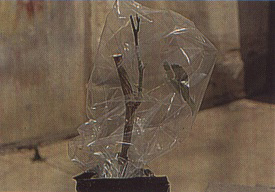
For small-scale indexing the stocks, which can be either indicators or candidate vines, are forced to grow vigorously to allow development of one robust shoot (Figure 231). This shoot is cut at the level of the third or fourth internode (Figure 232). Green scion material the same size as that of the stock is collected (Figure 233) and grafted by making a slanting cut that fits into a comparable slant on the stock or by inserting a wedge-cut shoot tip into a cleft made in the shoot of the stock (Figure 234). The graft is tied with plastic grafting tape or plastic film (Figure 235) and protected from dehydration with a polythene bag (Figure 236). The bag is removed after a couple of weeks and the graft is left on the greenhouse bench for appearance of symptoms. For large-scale indexing, a mechanized green grafting technique has recently been developed in France by INRA (Institut national de la recherche agronomique, Colmar) and GCEV (Groupement champenois d'exploitation viticole, Mumm Recherche, Epernay) (Walter et al., 1990).
Herbaceous cuttings (18 to 35 cm long and 1 .5 to 2.5 mm in diameter) are collected from grape indicator varieties and grown either in a mixture of soil compost, sand and peat (1:1:1) or on rockwool cubes (Figure 237) watered twice a week with the following nutrient solution (Huglin end Julliard, 1964):
KNO3, 800 g
MgSO4, 7H2O, 300g
(NH4), HPO4 200 g
H2SO4, 50 ml
H3PO4, 17 ml
MnSO4 H2O 1.5 g
H3BO3, 15 g
ZnSO4 7H2O 1.5 g
CuSO4, 0.5 g
(NH4)6, Mo7O24, 4H2O,
0.05 g
Edetate sodium Fe (e.g. Sequestrene 138 FeR), 15 g
The chemicals are dissolved in 1000 litres of water and pH is adjusted to 6.0.
Cuttings are grown at a mean temperature above 20°C and a day length of 16 hours with a light intensity of 2 500 lux.
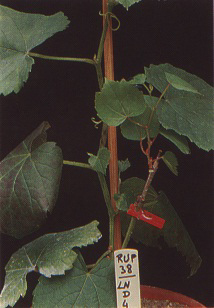
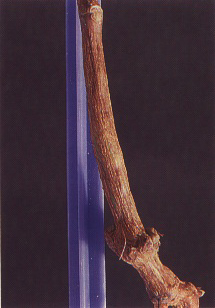
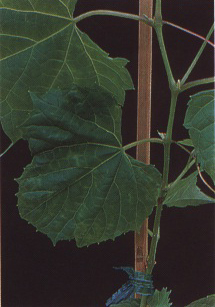
Wedge-shaped, one-bud cuttings are inserted into a V-shaped cleft made at the top of the cuttings of the indicator by means of an appropriate grafting machine (Figure 238) (Martin et cl/., 1987). Scions and stocks are held together by small plastic clothes-pegs (Figure 239). Each grafted green cutting is then inserted with the basal extremity into a rockwool cube (Figure 240) and maintained in a plastic forcing chamber under saturated humidity at 25°C for at least 18 days. The cubes are watered twice a week with the above nutrient solution. The grafts are moved from the forcing chamber to greenhouse boxes at temperatures most appropriate for the expression of symptoms of the various diseases (e.g. 22°C for leafroll and fleck, 26°C for vein necrosis). Symptoms of fanleaf, leafroll (Figure 241), fleck, corky bark (Figure 242), stem pitting (Figure 243), vein mosaic (Figure 244), vein necrosis (Figure 245) and graft incompatibility appear much more quickly (20 to 60 days, except for stem pitting, which requires three to five months) than with conventional indexing techniques.
GROWTH CARE OF GRAFTED INDICATORS
Regardless of whether grown in greenhouse, screenhouse or open field, indicators should be forced to grow vigorously and be protected from diseases and pests which may obscure symptoms and even endanger their survival. For field-grown indicators, cultural practices are the same as those routinely used in nurseries.
Symptoms are usually read twice a year: once in late spring or early summer for growth abnormalities (leaf and cane deformations, reduced vigour, stunting), necrotic or chromatic disorders of the foliage (vein necrosis, chlorotic mottling, yellow discolorations), wood pitting or grooving; and once in autumn for abnormal pigmentation (red or yellow) of the leaves and, after leaf shedding, for cane abnormalities. At the end of the indexing period (usually three years) the vines are uprooted, the scion is cut down to 20 to 25 cm from the bud union, the roots are cut away and the main axis containing part of the scion and part of the rootstock is decorticated for observing the presence of stem pitting or stem grooving symptoms. To facilitate peeling, the material is autoclaved at 120°C for 20 to 30 minutes.
Records of indicator reactions should be kept for each candidate accession or selection subjected to indexing. The time and appearance of symptoms, their type and severity are noted and compared with the responses of positive controls, i.e. reference indicator vines inoculated with budwood from sources known to be affected by specific diseases and grown at random in the indexing plot. Each plot should also contain negative controls, i.e. healthy, noninoculated indicator vines serving as trap plants for diseases that may spread naturally in the indexing nursery.
REFERENCES
Huglin, P. & Julliard, B. 1964. Sur l'obtention de semis de vignes très vigoureux à mise à fruits rapide et ses répercussions sur l'amélioration génétique de la vigne. Ann. Amélior. Plantes, 14: 229-244.
Martin, C., Vernoy, R., Carré, M., Vesselle, G., Collas, A. & Bougerey, C. 1987. Vignes et technique de culture in vitro. Quelques résultats d'une collaboration entre recherche publique et entreprise privée. Bull. OIV, 675/676: 447-458.
Walter, B., Bass, P., Legin, R., Martin, C., Vernoy, R., Collas, A. & Vesselle, G. 1990. The use of a green grafting technique for the detection of virus-like diseases of the grapevine. J. Phytopathol., 128: 137-145.
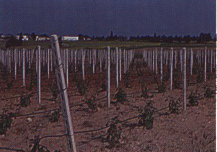
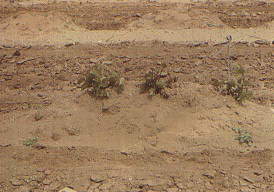
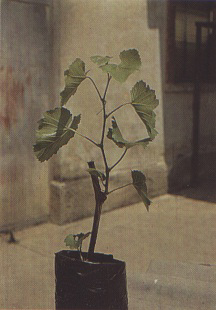
FIGURE 185 Newly established mother vine planting of indicators. Note the drip irrigation pipe
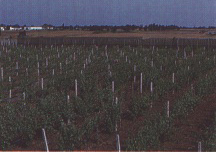
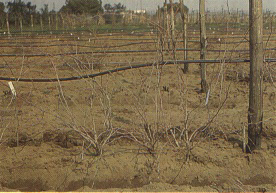
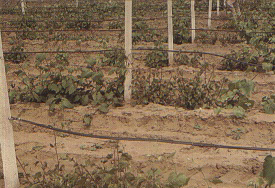
FIGURE 186 Mother vine planting of indicators in full growth
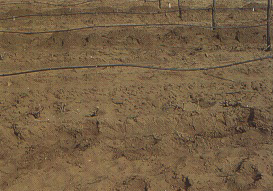
FIGURE 190 General view in winter of a planting of candidate vines to be indexed
FIGURE 192 Candidate vines undergo pruning for eliminating the shoots
FIGURE 193 Pruning is completed
FIGURE 194 Soil around candidate vines is removed to expose crown roots
FIGURE 195 Crown roots are exposed
FIGURE 196 Cutting away crown roots
FIGURE 197 Candidate vines ready for beheading
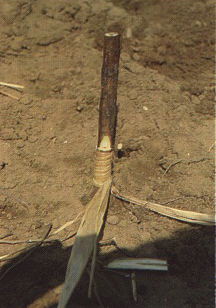
FIGURE 198 Candidate vines being beheaded
FIGURE 199 Stumps of candidate vines ready for cleft cutting
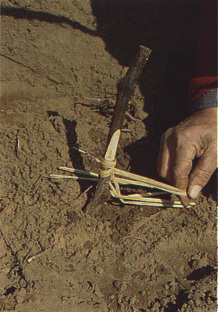
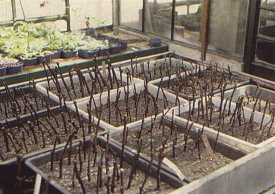
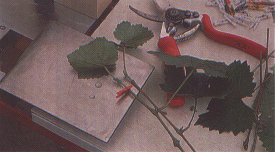
FIGURE 200 Wooden box containing bud sticks of an indicator and a bundle of raffia
FIGURE 201 Indicator bud stick wedge-cut at one extremity
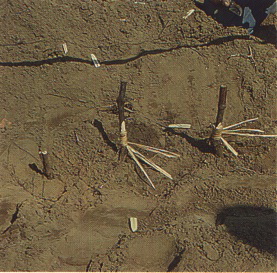
FIGURE 202 Median cleft being made with a budding knife in the stump of a candidate vine
FIGURE 204 Indicator bud stick in place
FIGURE 205 graft being tied with raffia
FIGURE 206 Tying of the graft completed
FIGURE 207 Grafted vines being covered with soil
FIGURE 208 Soil covering completed. End of grafting operation
FIGURE 209 Spring growth pushing from grafts
FIGURE 210 Indexing plot in summer
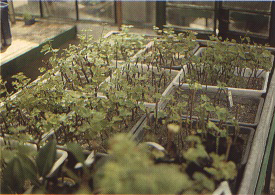
FIGURE 212 Vegetating canes ready for chip-budding and transplanting
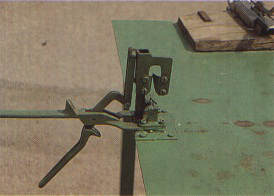
FIGURE 214 Simple hand-operated grafting machine (V-shaped cut)
FIGURE 215 Hand-operated bench grafting machine (chip-bud graft)
FIGURE 216 Hand-operated bench grafting machine (V-shaped cut)
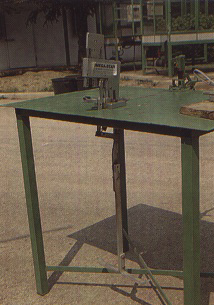
FIGURE 217 Foot-operated bench grafting machine (omega cut)
FIGURE 218 Close-up of the machine illustrated in Figure 217
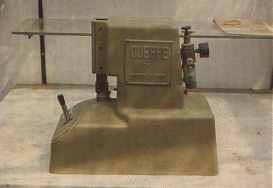
FIGURE 219 Saw-type electricity-powered grafting machine
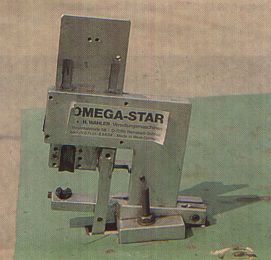
FIGURE 220 Omega-type electricity-powered grafting machine
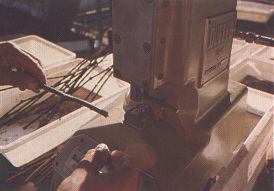
FIGURE 221 Omega-type machine in operation (Photo: 13. Di Terlizi)
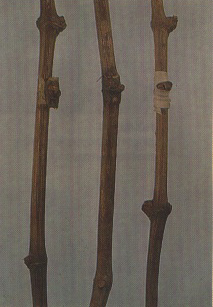
FIGURE 223 Types of machine-made cuts (from left to right): omega, V-shaped, saw-type
FIGURE 224 Waxing newly made machine grafts (Photo: B. Di Terlizzi:
FIGURE 225 Commercial grafting wax before melting
FIGURE 229 Calloused graft ready for hardening (Photo: B. Di Terlizzi )
FIGURE 230 Green hardened grafts ready for transplanting in the field Photo: B. Di Terlizzi)
FIGURE 231 Green grafting: candidate vine pushing a shoot
FIGURE 235 graft union wrapped with plastic film
FIGURE 237 Large scale green grafting. Young self-rooted indicator vines growing on rockwool cubes
FIGURE 238 Machine for green grafting
FIGURE 239 Green graft held in place by a plastic clothes-peg
FIGURE 240 Green-graHed cuttings stuck in rockwool, ready for forcing
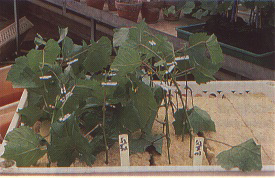
FIGURE 241 Leafroll symptoms shown by a green-grafted indicator (left)
FIGURE 242 Incipient corky bark symptoms shown by a green-graRed indicator
FIGURE 243 Stem pitting symptoms shown by a green-grafted indicator
FIGURE 244 Vein mosaic symptoms shown by a green-grafted indicator
FIGURE 245 Stunting induced by vein necrosis in a green-grafted indicator
G.P. Martelli
Many of the viruses infecting grapevines in nature (e.g. those listed in Table 2) are transmissible by inoculation of sap to herbaceous hosts. Various closteroviruses differ in that some are mechanically transmissible, although with varying degrees of difficulty, whereas others are not. All phloemlimited viruses with isometric particles have so far resisted sap transmission. The procedure for mechanical inoculation is simple. It can be applied with a reasonable degree of success if some basic requirements in the management of herbaceous hosts and handling of the inoculum are fulfilled.
COLLECTION AND HANDLING OF INOCULUM
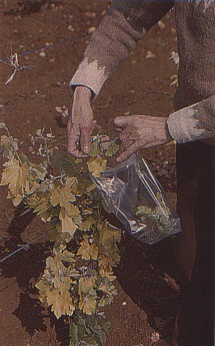
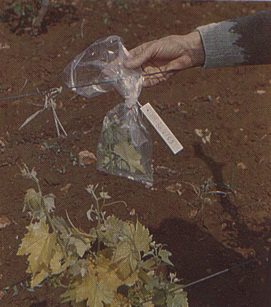
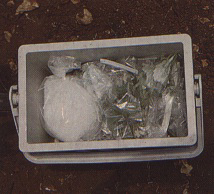
In principle, parts of any living organ of an infected vine can serve as a source of inoculum for sap transmission. In practice, however, the chances for successful transmission are best if young, tender tissues from developing leaves or root tips are used. When leaves are used, as most frequently happens, the terminal parts of symptomatic shoots are collected (Figures 246 and 247) and placed in a polythene bag (Figure 248), which is sealed and labelled (Figure 249). If the place of collection is at a distance from the laboratory, the samples should be kept in an ice chest (Figures 250 and 251) for transport. Exposure to direct sun or to a hot environment such as a car boot should be avoided. In the laboratory the samples are processed immediately or placed in a refrigerator at 4°C. Cold storage can last up to a couple of weeks or more if the samples have been properly handled during collection and transport. Prolonged storage in a freezer at -20°C is possible but not devoid of risk, for the particles of certain viruses (e.g. nepoviruses) may disassemble during thawing, thus decreasing the infective power of the extracts.
TOOLS AND MATERIALS FOR INOCULATION
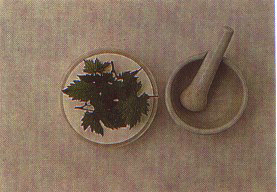
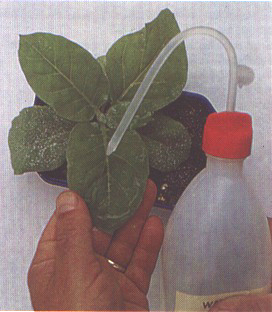
Tools and materials for inoculation (Figure 252) include the following:
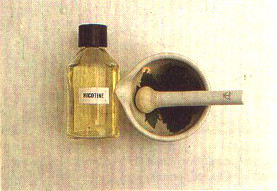
For grapevine viruses two main extraction media are used. The first is nicotine (2.5 ml) dissolved in distilled water (97.5 ml). This solution can be kept for several months, especially if stored in a refrigerator. The alternative is phosphate buffer, 0.1 M, at pH 7, made from the following stock solution ( 1 M):
Mix 3.86 ml of solution A with 6.14 ml of solution B and dilute tenfold. This solution does not need to be prepared freshly each time; it can be stored in the refrigerator for a few weeks.
INOCULATION PROCEDURE
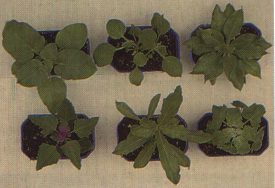
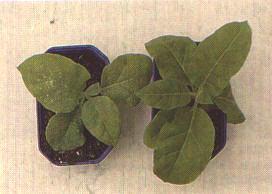
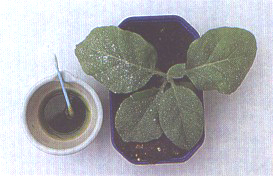
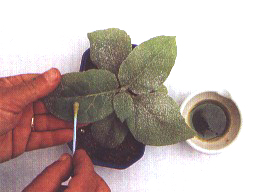
The hosts to be inoculated are selected (Figure 253), transferred to the greenhouse bench where the inoculation is to be made and dusted with the abrasive powder (Figure 254). The infected sample is placed in the mortar and ground with one to three volumes of the extraction medium (Figures 255 and 256). The slurry is gently rubbed (with a cotton swab dipped in the medium) on to the host's leaves (Figures 257 and 258), which are then rinsed with tap water (Figure 259). Inoculated plants are grown a/temperatures preferably not below 18°C or above 26°C and are checked for symptom appearance.
FIGURE 247 Shoot tip from a symptomatic vine being cut away for collection
FIGURE 248 Collected shoot tip being placed in a polythene bag
FIGURE 249 The bag containing samples is labelled and sealed
FIGURE 250 An ice chest for transporting fresh samples to be tested in the laboratory
FIGURE 251 Samples placed in the ice chest, ready for transport
FIGURE 255 Leaf tissues from a vine to be tested in a sterile mortar prior to grinding
FIGURE 256 Leaf tissues ground in the presence of a suitable extraction medium
FIGURE 257 Mortar containing inoculum ready to be rubbed on the leaves of the adjacent host
FIGURE 258 Inoculation by gentle rubbing of the inoculum on the leaf surface with a cotton swab
FIGURE 259 Host leaves rinsed with tap water immediately after inoculation
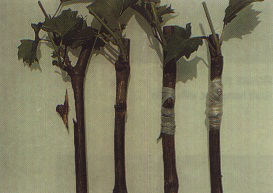