Section 1: General information
Weights, measures and oven temperatures:
Recipe preparation terms and definitions:
Processing techniques and equipment:
Drying
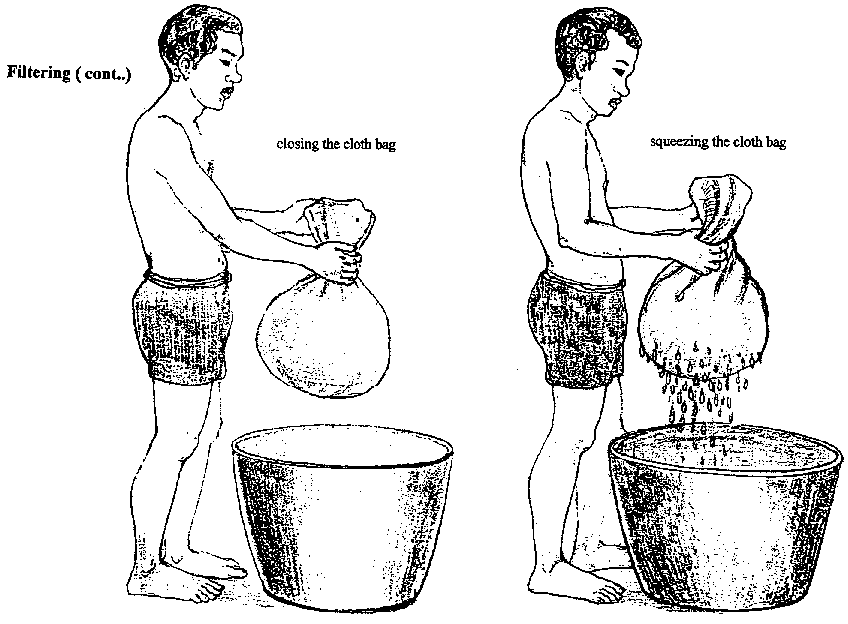
Filtering
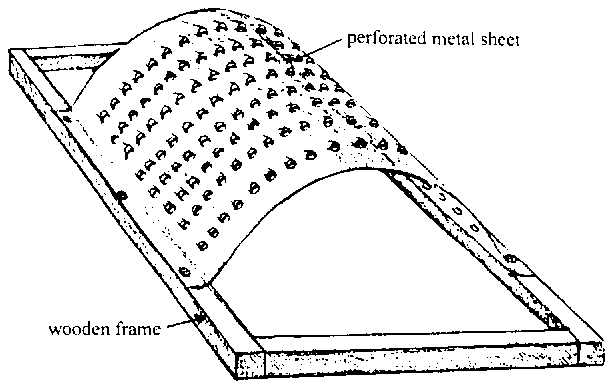
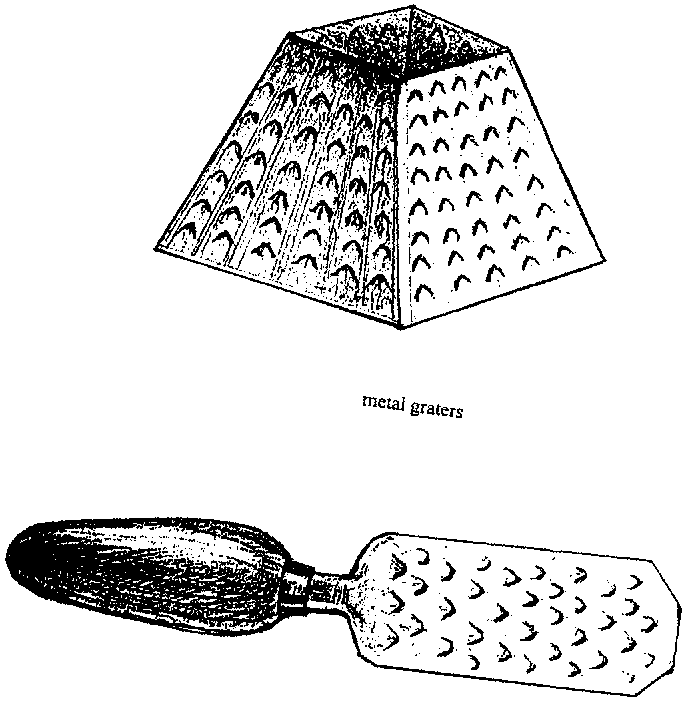
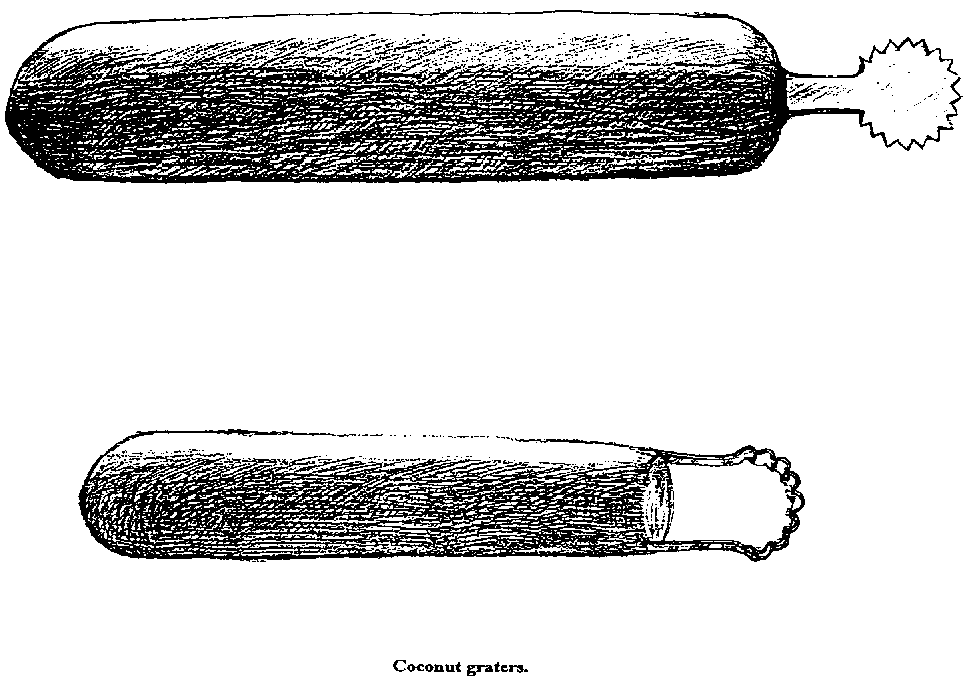
Grating
Grinding
Peeling
Pressing
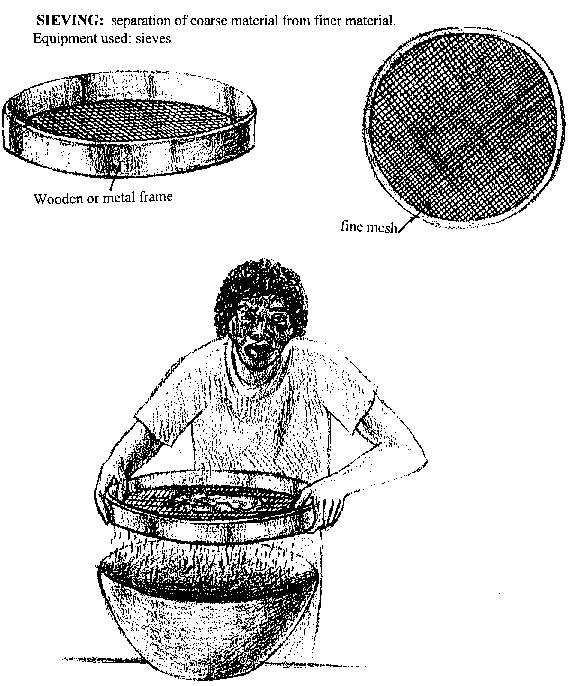
Sieving
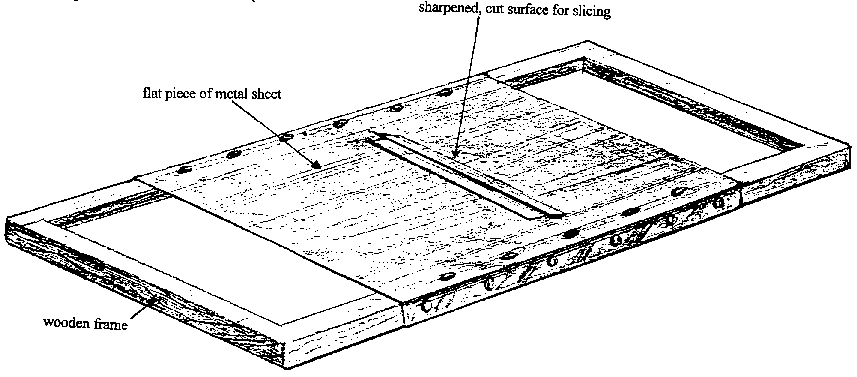
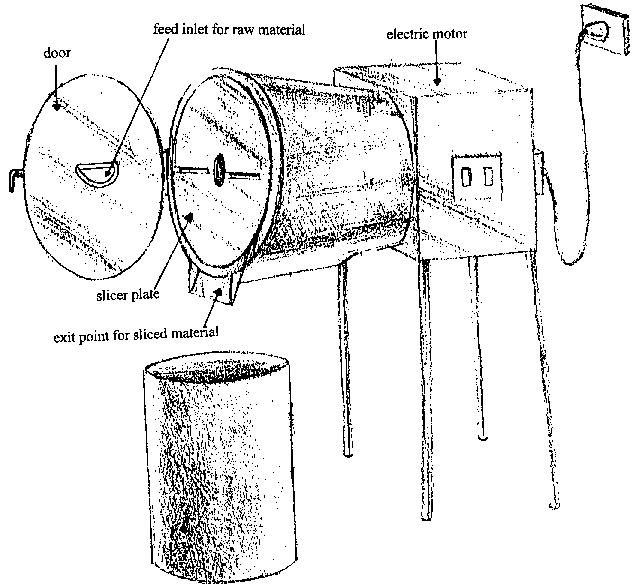
Slicing
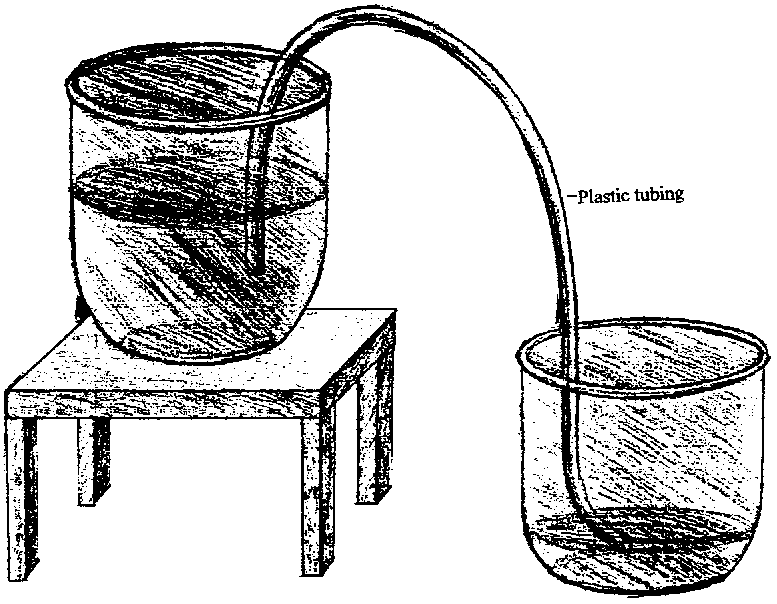
Syphoning
Locally fabricated "drum" oven.
Cooking
utensils.
Quality control procedures and equipment.
Packaging materials and product labelling.
Electric
bag sealer
Candle and hacksaw blade method of sealing
plastic bags
Weights, measures and oven temperatures:
The recipes presented in this publication have been adapted for use by rural, village households, where it is acknowledged that equipment such as weighing scales may not be available. The use of common kitchenware items such as teaspoons, dessertspoons and coffee mugs have been used as measuring . If the reader intends to use the recipes as a basic formulae for producing the products at the small scale, industrial level then the use of weighing scales and graduated ( volume ) measuring jugs are strongly recommended.
Similarly, it is appreciated that most rural, village households do not have access to modern gas cookers with pre - calibrated temperature dials. Cooking temperatures stated in the following recipes are general indicators of the oven temperature required to cook the product. Where readers have access to more modern cookers or small scale industrial ovens, then pre calibrated temperature settings should be used. The use of an accurate probe type thermometer is recommended for checking cooking temperatures at the small scale industrial level [ see section on quality control for more information ].
Exact weight, volume and temperature equivalents to the measures and descriptions used in the recipes presented in this book are listed below.
Volumes:
| Comodity | Measure | Exact volume equivalent |
| Water | 1 mug | 250 mls |
| 1 tablespoon | 20 mls | |
| Vanilla essence | 1 teaspoon | 5 mls |
| Cooking oil | 1 mug | 260 mls |
| Milk, fresh | 1 mug ( full ) | 250 mls |
| Lemon or lime juice | 1 tablespoon | 20 mls |
| 1 teaspoon | 5 mls |
Weights:
| Commodity | Measure | Exact volume equivalent |
| Root Crop Flour: | ||
| Cassava flour | 1 mug | 145 grams |
| 1 tablespoon | 20 grams | |
| Sweet potato flour | 1 mug | 100 grams |
| 1 tablespoon | 15 grams | |
| Taro flour | 1 mug | 140 grams |
| 1 tablespoon | 20 grams | |
| Yam flour | 1 mug | 130 grams |
| 1 tablespoon | 15 grams | |
| Root Crops Fresh: | ||
| Average weight grated pulped | 1 tablespoon | 40 grams |
| 1 tablespoon | 60 grams | |
| Root crop, cooked and mashed: | ||
| Average weight | 1 mug | 315 grams |
| Cassava | 1 mug | 280 grams |
| 1 tablespoon | 35 grams | |
| 1 teaspoon | 10 grams | |
| Sweet potato | 1 mug | 160 grams |
| 1 tablespoon | 20 grams | |
| 1 teaspoon | 5 grams | |
| Taro | 1 mug | 80 grams |
| 1 tablespoon | 35 grams | |
| 1 teaspoon | 10 grams | |
| Yarn | 1 mug | 120 grams |
| 1 tablespoon | 15 grams | |
| 1 teaspoon | 4 grams | |
| Baking powder | 1 teaspoon | 31/2 grams |
| Bicarbonate of soda | 1 teaspoon | 31/2 grams |
| Sugar | 1 mug | 160 grams |
| 1 tablespoon | 20 grams | |
| Milk powder | 1 tablespoon | 10 grams |
| Margarine | 1 tablespoon | 60 grams |
| 1 dessertspoon | 30 grams | |
| Ngali nuts, ground | 1 mug | 150 grams |
| Honey | 1 tablespoon (level) | 40 grams |
| Grated coconut | 1 mug | 80 grams |
| 1 tablespoon | 10 grams | |
| Salt | 1 teaspoon | 4 grams |
| Onion, finery chopped | 1 tablespoon | 35 grams |
| Wheat flour | 1 mug | 115 grams |
| Dried yeast | 1 tablespoon | 20 grams |
The following conversion factors can also be used when tablespoons cannot be purchased locally:
1 tablespoon = 2 dessertspoons or 4 teaspoons = 20 mls
1 dessertspoon = 2 teaspoons = 10 mls
1 teaspoon = 5 mls
1 cup = 16 tablespoons = 250 mls
Oven temperatures:
| RECIPE DESCRIPTION | TEMPERATURE |
GAS MARK | |
| °F | °C | ||
| VERY COOL | 275 | 140 | 1 |
| COOL | 300 - 325 | 150 - 160 | 2 |
| MODERATELY HOT | 350 - 375 | 180 - 190 | 3 |
| HOT | 400 - 425 | 200 - 220 | 4 |
| VERY HOT | 450 - 475 | 230 - 250 | 5 |
Recipe preparation terms and definitions:
Beat: to stir very hard
Cream: to beat ingredients into a creamy, smooth consistency using a fork.
Fold: to mix ingredients together in gently
Batter: a mixture of flour, eggs and milk
Processing techniques and equipment:
The processing techniques described in this publication are defined below. The equipment used or developed by the project for carrying out each operation are described and illustrated. Where items of equipment were purchased from overseas manufacturers, the suppliers name and address is given in Annex 1.
DRYING: remove water or moisture from a product.
Drying food material in the sun is the oldest form of food preservation. The sun's energy is used to evaporate most of the moisture from the food. The simplest way of drying food material is to spread thin layers of the materials on a piece of matting in an open, sunny space. However, if the food material is unprotected, then there is a chance of it becoming contaminated by dirt, insects, rain and animals walking over it.
Solar driers:
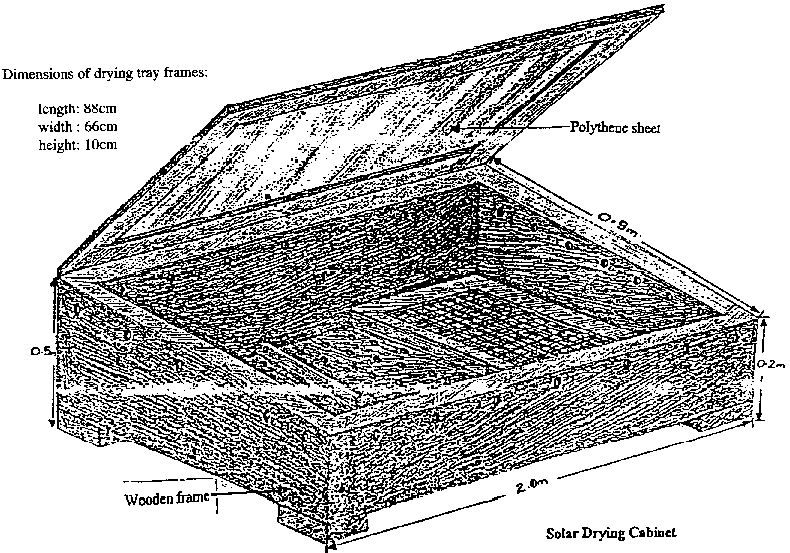
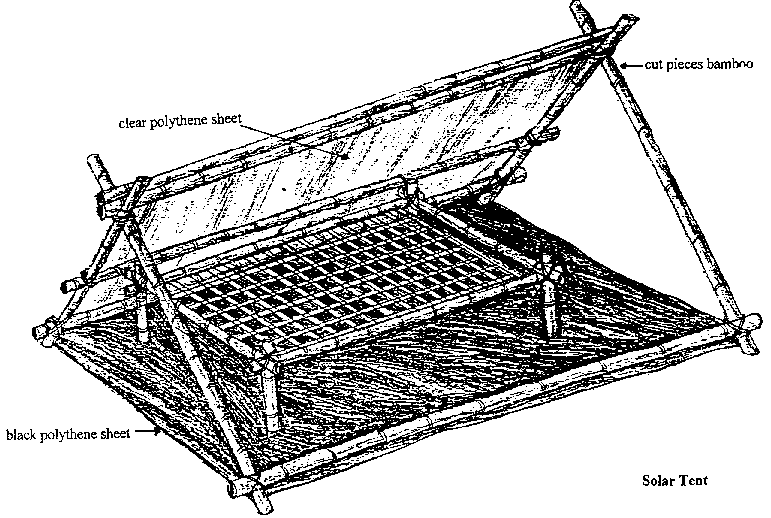
The two types of solar driers illustrated below are not only designed to keep the food material clean during the drying operation but also reduce the time required to dry the material.
The solar drying cabinet is made from 2.5 cm thick wood, which is painted black all over. The black surface absorbs heat from the sun and helps to raise the temperature of the air inside the cabinet to facilitate a faster rate of drying the product. The frame of the lid is a made of thin, lightweight wood ( also painted black ) which supports a sheet of clear plastic. The clear plastic cover allows the suns energy to enter the cabinet and heat the air inside. The base and upper edges of the cabinet are perforated with 1 cm diameter holes at intervals of 1- cm. The holes allow air to circulate freely throughout the chamber of the cabinet and remove the water which is being evaporated from the food material. The food material is placed on a series of wooden framed trays within the cabinet. The frames of the trays are made of a lightweight wood which support fine mesh material ( such as mosquito netting; ). The trays sit on 2.5 cm square pieces of wooden rods so that they do not touch the based of the cabinet. This again facilitates the free movement of air around the product and a faster rate of drying.
The solar tent works on the same principle as the solar drying cabinet but is lighter in weight, cheaper to make and easier to carry from place to place. The tent frame is made from bamboo or 2.5 cm square pieces of wood, secured in an A frame arrangement. The clear plastic sheet is secured over the A frame. The material to be dried is placed on a "table" made out of a bamboo frame and fine mesh. The table is placed on a sheet of black plastic and covered by the tent frame.
When using solar driers, they should be placed in a sunny location. In addition, they should be placed on concrete or any surface which is not wet and which will not retain moisture ( i.e. grassy areas or muddy areas are not suitable surfaces to put solar driers on ). The driers should be slightly raised off the ground. A clearance space of at least 1 10 cm is recommended to allow the air to circulate freely. The clear plastic surface of the drier should be kept dry and clean. It is best to allow the solar drier to warm up in the sun before putting the material to be dried inside. Material being dried by this method should be put out in the sun as in the early morning to make full use of the sun.
Solar driers are cheap to use and simple to make. However, the disadvantages are that the drying of food material is entirely dependent on the weather. It often takes more than one day to thoroughly dry the food material and the food may spoil if the weather changes during the drying process. For commercial operations, depending on the weather for drying is not a reliable operation.
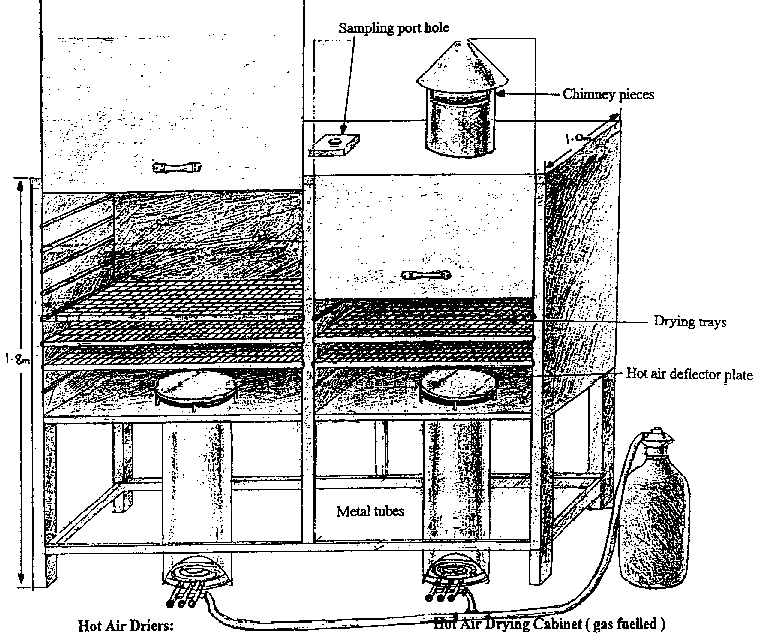
Hot air driers:
Hot air driers which use gas to heat up the air is another means of drying food quickly and relatively cheaply. The hot air drying cabinet illustrated below is relatively simple in design and does not involve the use of electric fans to distribute the hot air over the material being dried. Two gas burners situated at the bottom of each metal tube, quickly heats up the surrounding air. The hot air rises and enters the drying cabinet chamber. It hits the deflector plate at the top of the metal tube, is dissipated within the chamber cabinet and passes over the food material, spread out on the stacked trays. As the air escapes out of the chimney' on the top of the cabinet, it carries with it the moisture which has evaporated from the food material. With hot air driers, food can be dried within a 4 - 6 hours. The temperature of the air inside the drying cabinet should be monitored as air temperatures can become too hot causing the food material to burn rather than dry. A digital thermometer and rod type probe ( see quality control section for details of this type of instrument ) is ideal for monitoring air temperatures during the drying process. Air temperatures should not exceed 50 - 55°C.
The hot air drying cabinet illustrated below, is made out of wood and metal. The main frame of the cabinet is 5cm square wood with 2cm thick wooden side panels. Ideally all the wood used should have been pre - treated to prevent the risk of fire. The sliding doors are made of 1.25cm thick plywood. The chimney pieces, deflector plates and tubes leading from the gas burners are made of 1 mm thick galvanised sheet steel. The screws used to secure the metal pieces onto the wooden frame are made of brass to prevent rusting over time. The trays are made of a thin wooden frame with metal mesh centre. The trays slide into the cabinet along rails made of wooden rods. The cabinet should be brushed with linseed oil from time to time to counteract the effects of over drying and cracking.
Dimensions of drying tray frames
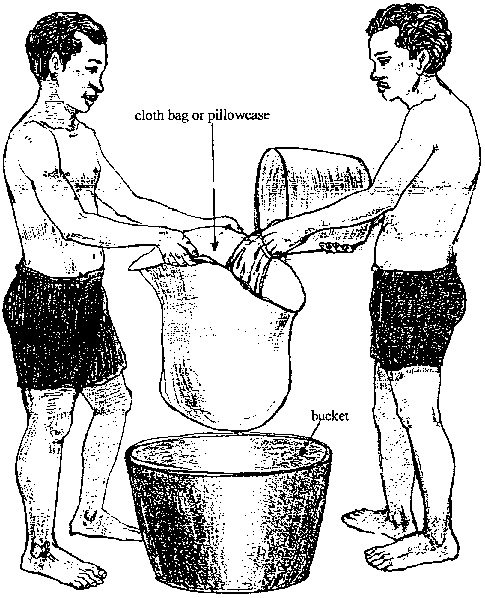
FILTERING: pass material slowly through a device which permits fluid to pass through but retains solid particles. Equipment used: fine piece of muslin cloth or pillowcases. The fabric used should be fine enough to allow the liquid to pass through but retain the coarser material or pulp.
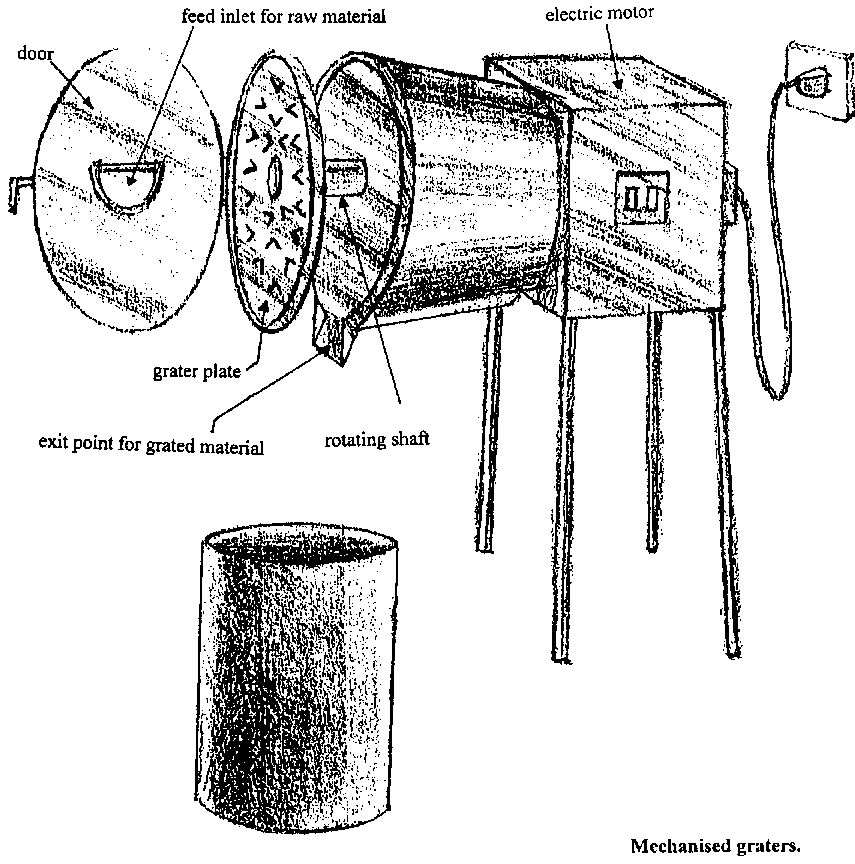
GRATING: Grating is the action of rubbing the vegetable or fruit against a rough surface ( a grater ) to produce small pieces of the food material.
The food material can be grated using manually operated or mechanised graters.
Manually operated graters have been designed for general purpose use or for use with specific commodities such as coconuts. The manually operated graters illustrated below can either be purchased from stores or made at home.
The wooden framed, manually operated, general purpose grater illustrated below is made from wood and galvanised sheet steel. The frame is made of 2.5 cm square cut pieces of wood. The perforated surface is made from a curved piece of galvanised sheet steel which is screwed onto the wooden frame. Ideally the sheet of steel should be screwed onto the wooden frame using brass screws to avoid rusting. The holes in the steel are made by punching the surface with a strong 2 - 3 inch nail. The holes should be made by punching the nail though from the underside of the piece of metal. This ensures that the rough edges, against which the vegetable is to be rubbed, are on the outside surface. These graters can be made in any size required. They should however be thoroughly dried after cleaning to stop them rusting.
Coconut graters are readily available on the local market. Mechanised graters are useful for commercial operations only. The supplier of the mechanised grater illustrated below is given in Annex 1.
Manually
operated general purposed graters.
Manually operated general purposed
graters (cont.)
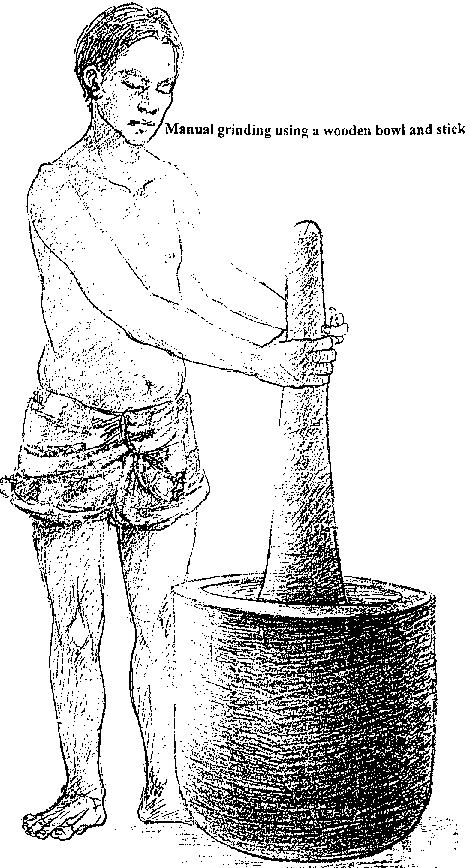
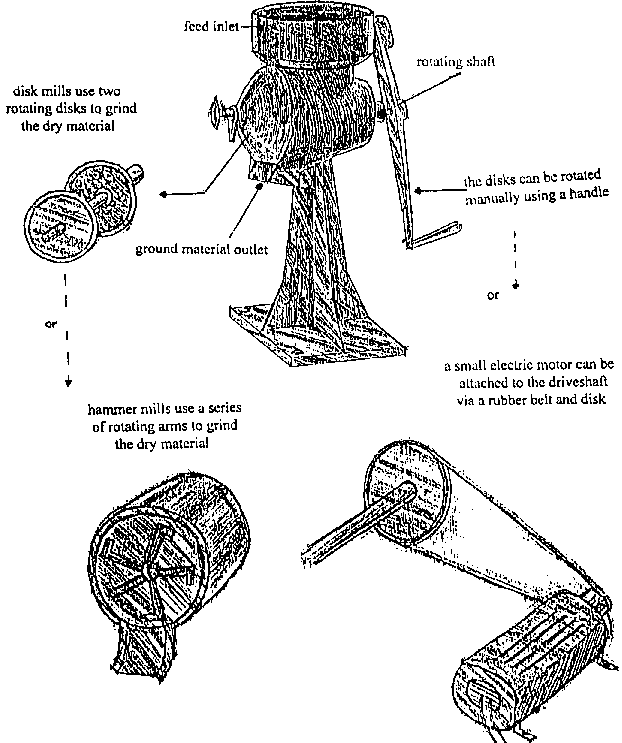
GRINDING: crushing material into powder form.
Mechanised / manual grinding using mills
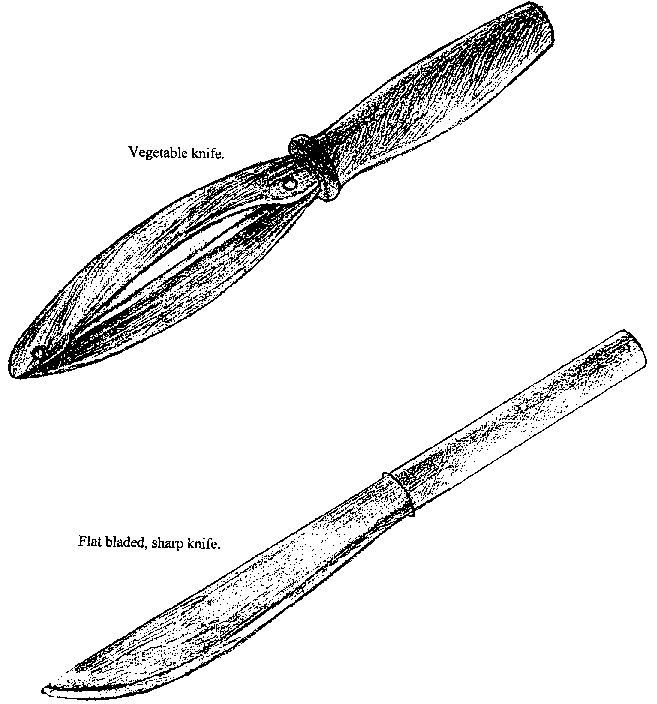
PEELING: removing the skin of the vegetable or fruit. Equipment used:
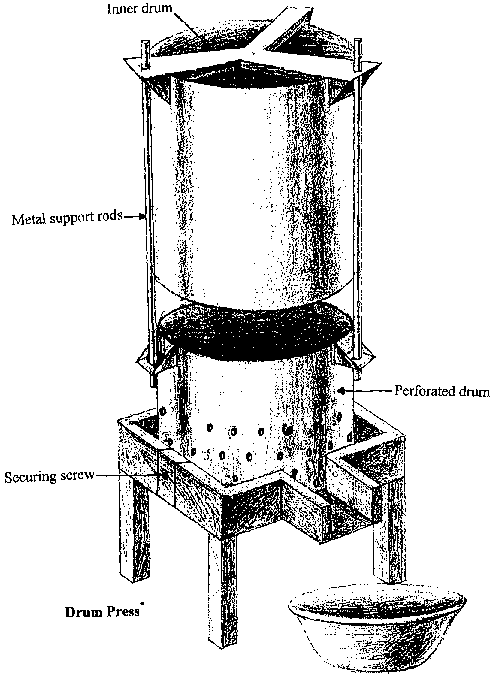
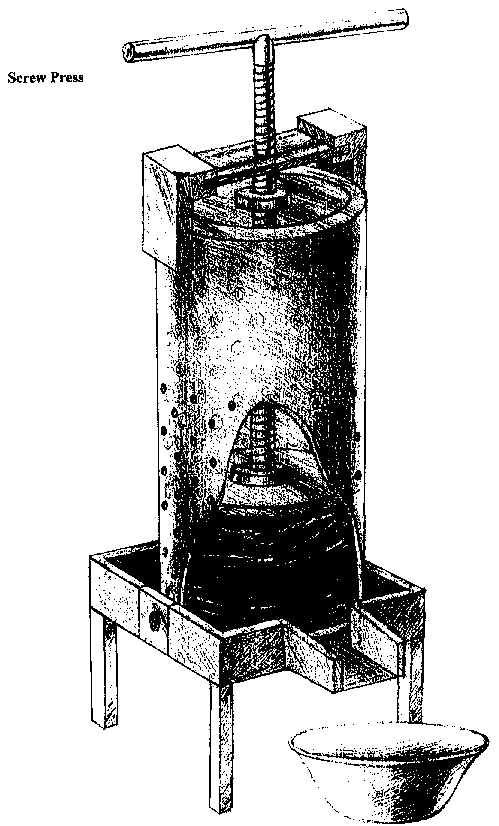
PRESSING: Pressing describes the action of pushing or squeezing material to exude liquid.
Pressing can be carried out by hand or by using a press. The two presses illustrated below are made out of galvanised sheet steel.
The drum press is suitable for making gari. The cotton bag containing the cassava pulp is placed inside the perforated drum. The second drum is lowered down and screwed in place as tightly as possible. This step is equivalent to placing weighted material on top of the bag of cassava pulp. As the cassava de - waters over a few days, the screws are tightened further to maintain pressure on the pulp. The water runs out of the press through the perforations in the outer drum and is collected in the bucket underneath the stand.
The dimensions of the two drums are:
| - Outer perforated drum: | External diameter and height of 40 cm. The holes are 1/2cm diameter and spaced 21/2 cm apart from the bottom of the drum to a height of 1 5 cm up the drum |
| - Inner non - perforated drum: | External diameter of 30 cm and height of 50 cm. |
The drum supports are threaded pieces of mild steel.
The drum support stand is also made of galvanised steel, standing 0.6 m off the floor and with a surrounding lip of 0.1 m. On three sides of the table there are screws which tighten against the side of the perforated drum, to secure it onto the table.
The screw press is of a very similar design and suitable for use in pressing out the water from root crop pulp to collect the starch. The outer drum dimensions are the same as for the drum press. Instead of the inner drum, there is a metal or wooden plate attached to a centre screw piece. As the screw torque is turned the wooden or metal plate presses against the pulp in the cotton bag and presses out the water. The screw torque is fixed onto the drum by a metal bracket. The support stand is of the same dimensions as that supporting the drum press.
Sieving: separation of coarse material from finer material.
Slicing: cut vegetable or fruit into a thin, flat pieces.
Syphoning: drawing liquid from one container to another.
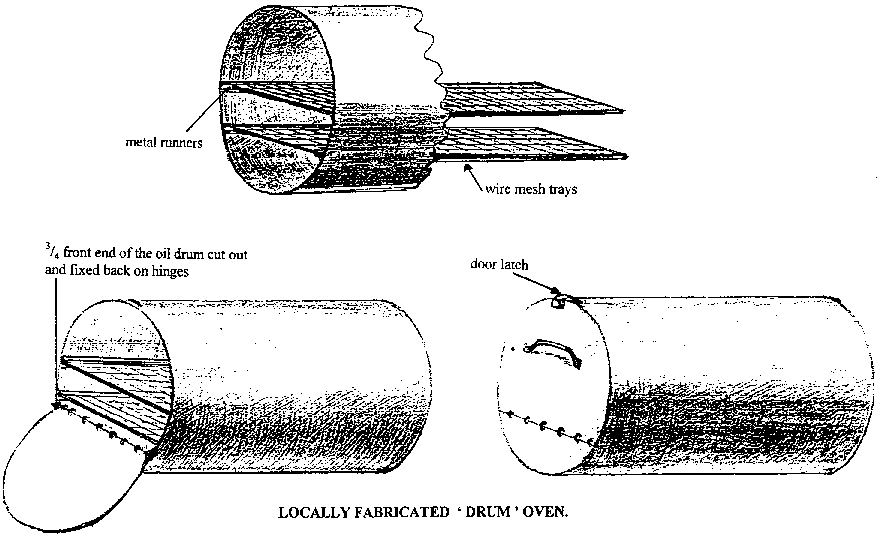
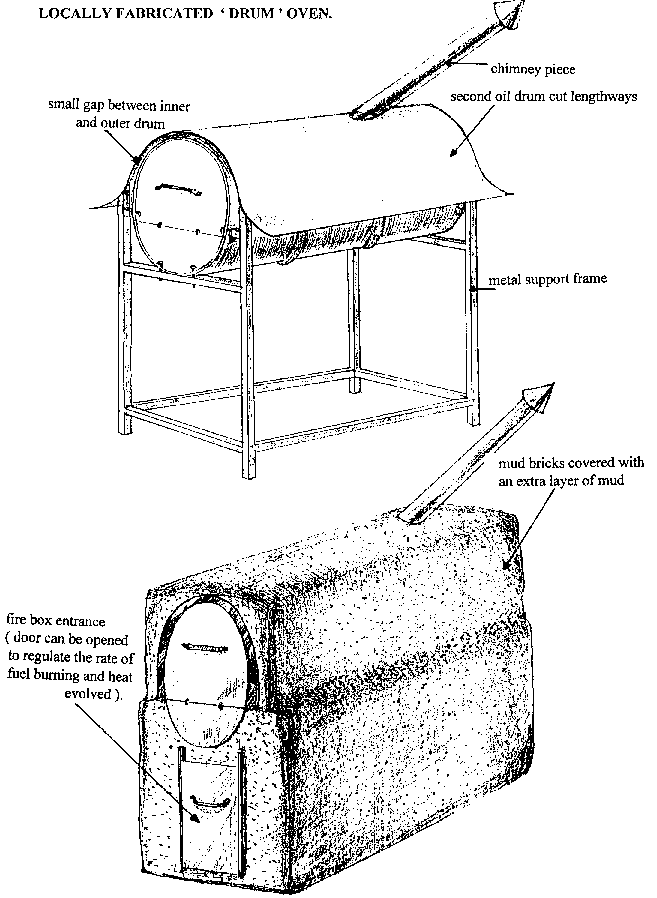
Locally fabricated "drum" oven.
The oil drum oven illustrated below mainly consists of a used, but non - rusted empty oil drum. One end of the oil drum is altered to form the door of the oven. Three quarters of the end plate is cut out and re - connected to the uncut end piece by means of three hinges. Four metal runners are fixed to the entire length of the inner drum wall. Two racks are then made out of stiff mesh and placed along the runners. These form the shelving upon which the baking tins and trays will be placed.
The central oven drum needs to be supported on a metal frame, its uppermost surface covered with a metal outer casing and a chimney piece put in place. The metal support frame is made from pre - formed galvanised steel rods - approximately 2.5 cm square. Where the metal support frame runs up the side of the central oven drum, there should be a one inch space. The frame and the centre drum should be joined together with metal brackets, still retaining the one inch gap. The metal cover over the central drum oven is made out of a same sized, used but non - rusted oil drum. Both end pieces are cut from this oil drum and the main body cut along its entire length. This cover is secured to the support frame and central oven drum using metal brackets. A one inch gap is left between the central oven drum and the outer cover. At the rear end of the drum, a 10cm diameter hole is cut out of the metal covering. A 1.5m long piece of galvanised steel pipe is welded onto this cover.at an angle of 20° to the upper surface of the covering surface.
The main structure of the oven is now completed. The main structure should now be placed on a level, concrete surface. Once in place the front sides and back of the oven should be built up with a number of clay bricks. These bricks can be easily made from heavy, clay soil and some sand. A number of wooden moulds of dimensions 18 x 10 x 30cm should be made. Into these mould the clay and sand mixture is compacted. The moulds are then removed and the bricks allowed to dry slowly and thoroughly in the sun. It is probably necessary to experiment a little with the clay and sand mixture to get, bricks which do not crumble or break when handled. Once ready, the bricks can be used to build the support wall around the entire metal structure, leaving at the base of oven door end for the fuel chamber. The bricks are fixed together using more of the clay and sand mixture used to fabricate the bricks. The upper surface of the metal cover also needs to be smothered with clay and sand mixture. The small gap between the front of the centre oven and the metal cover should be filled with clay and sand mixture to stop heat escaping. The clay and sand layer on top of the oven will help insulate it and improve cooking temperatures. The only other remaining feature which needs to be built is the fuel chamber door. This is constructed of a piece of sheet metal to which a metal handle is attached. This is then fixed to the clay and sand brick wall using metal runners. The fuel chamber door should slide up and down rather than open outwards. An up / down sliding feature facilitates better control over the rate of wood burning in the chamber and consequently control over cooking temperatures.
Before using the oven for baking, a small fire should be made in the fuel chamber and kept alight for as long as possible. Ideally a 24 hour period is best. This process allows the clay bricks to dry out slowly and "cures" the oven prior to its use. It prevents major cracks and break up of the clay wall during its use. Should any minor cracks appear in the clay walls then they should be filled up with more of the clay and sand mix.
Locally
fabricated "drum" oven.
Locally fabricated "drum"
oven. (cont.)
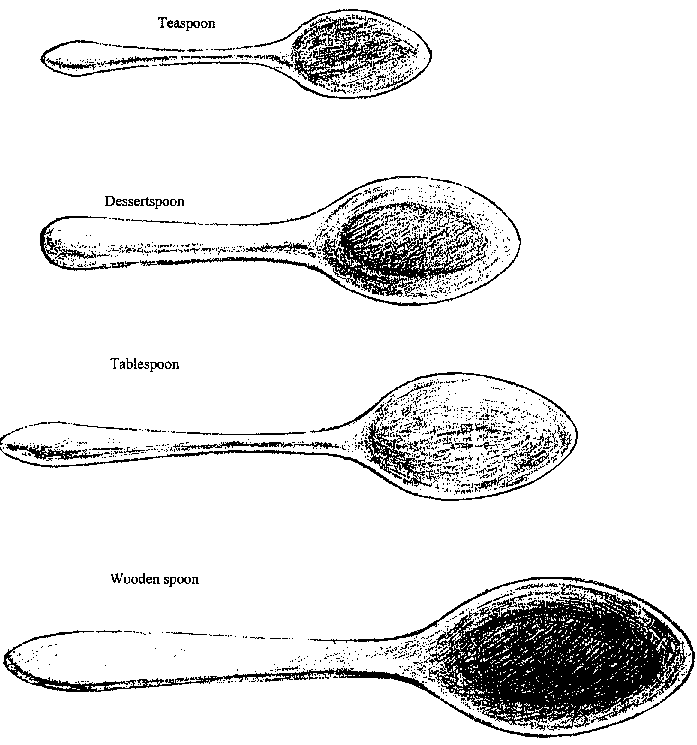
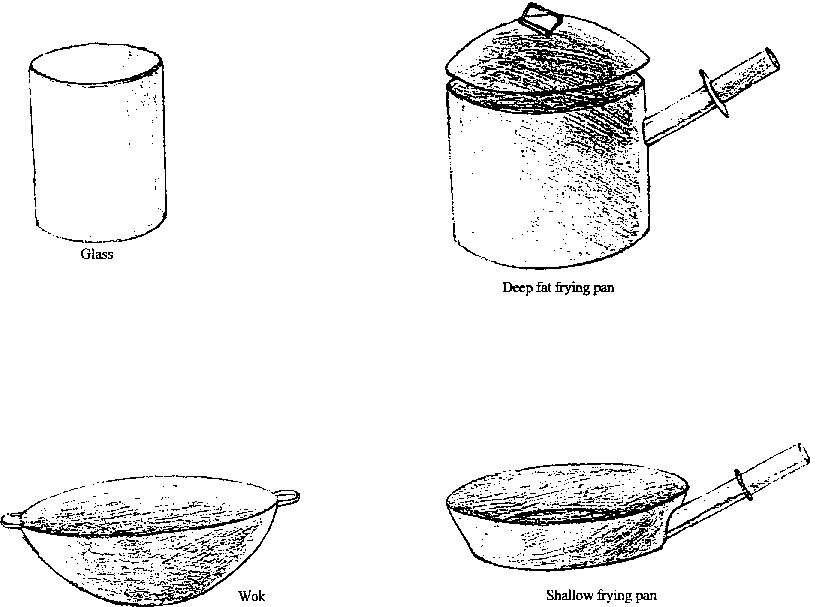
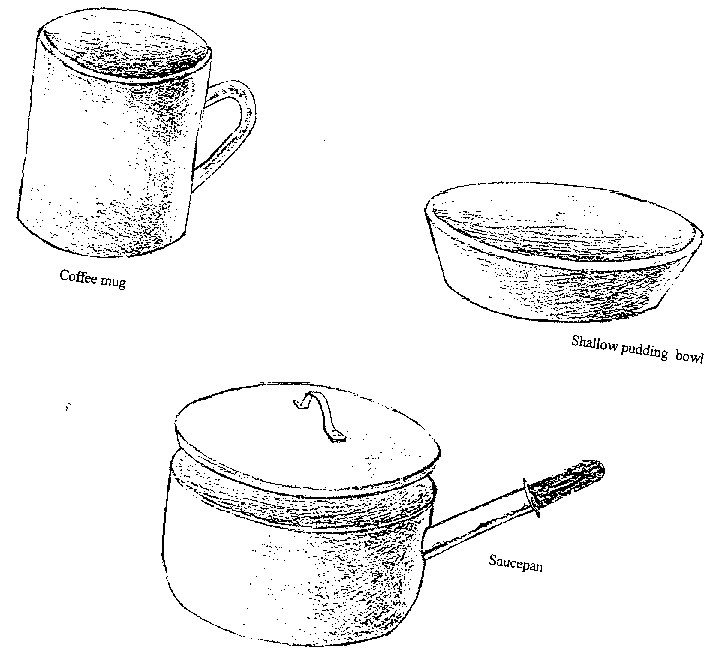
Cooking
utensils 1.
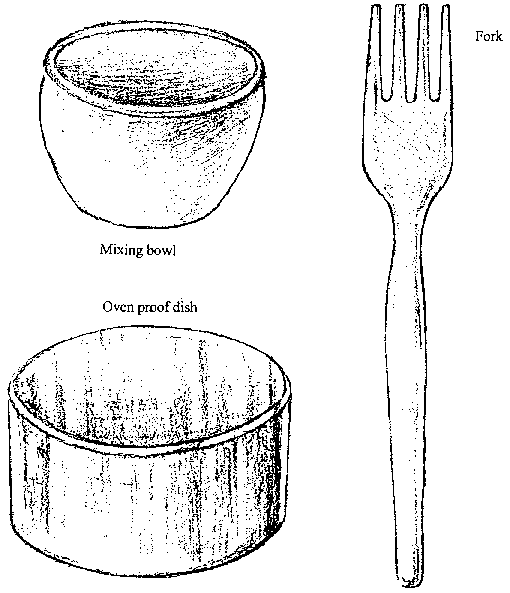
Cooking utensils 2.
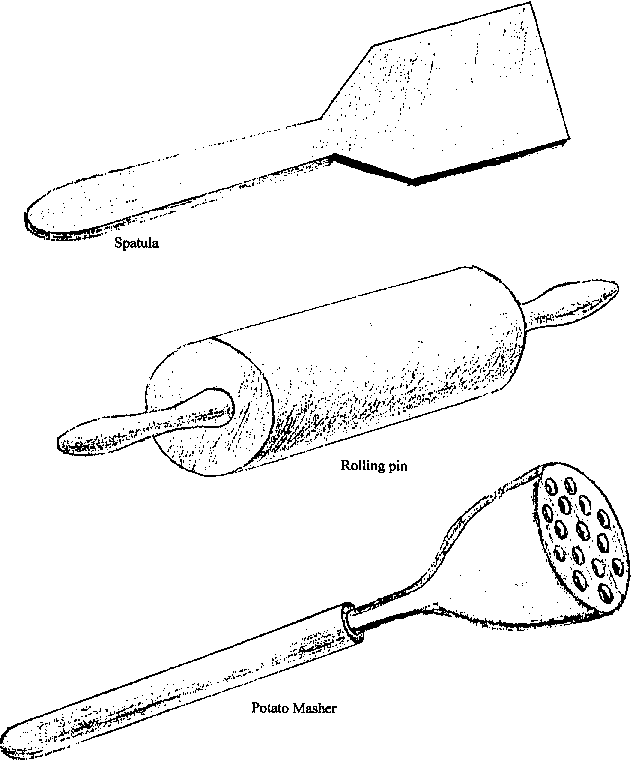
Cooking utensils 3.
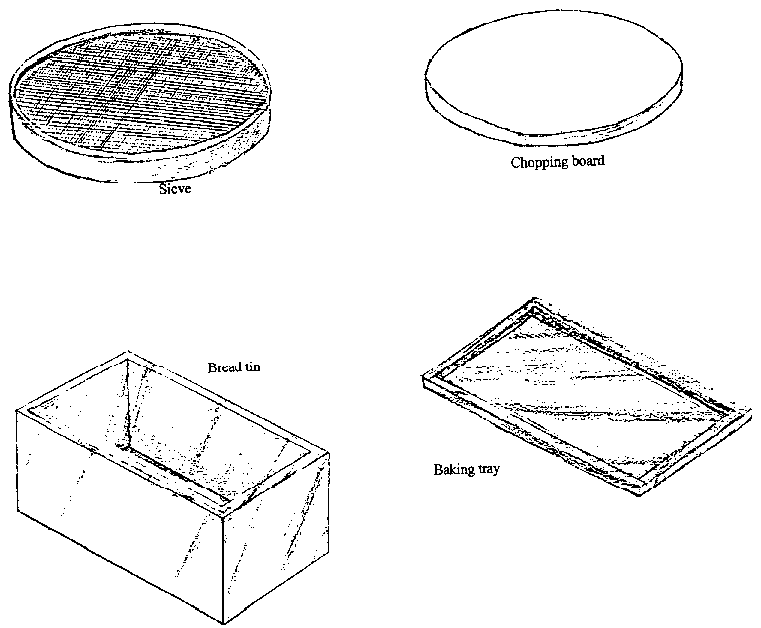
Cooking utensils 4.
Cooking utensils 5.
Cooking utensils 6.